Overview
Advance forms are custom questionnaires that you build and send to your clients for completion. You select and configure each question type, arrange them in sections, and customize the form to collect exactly the information you need.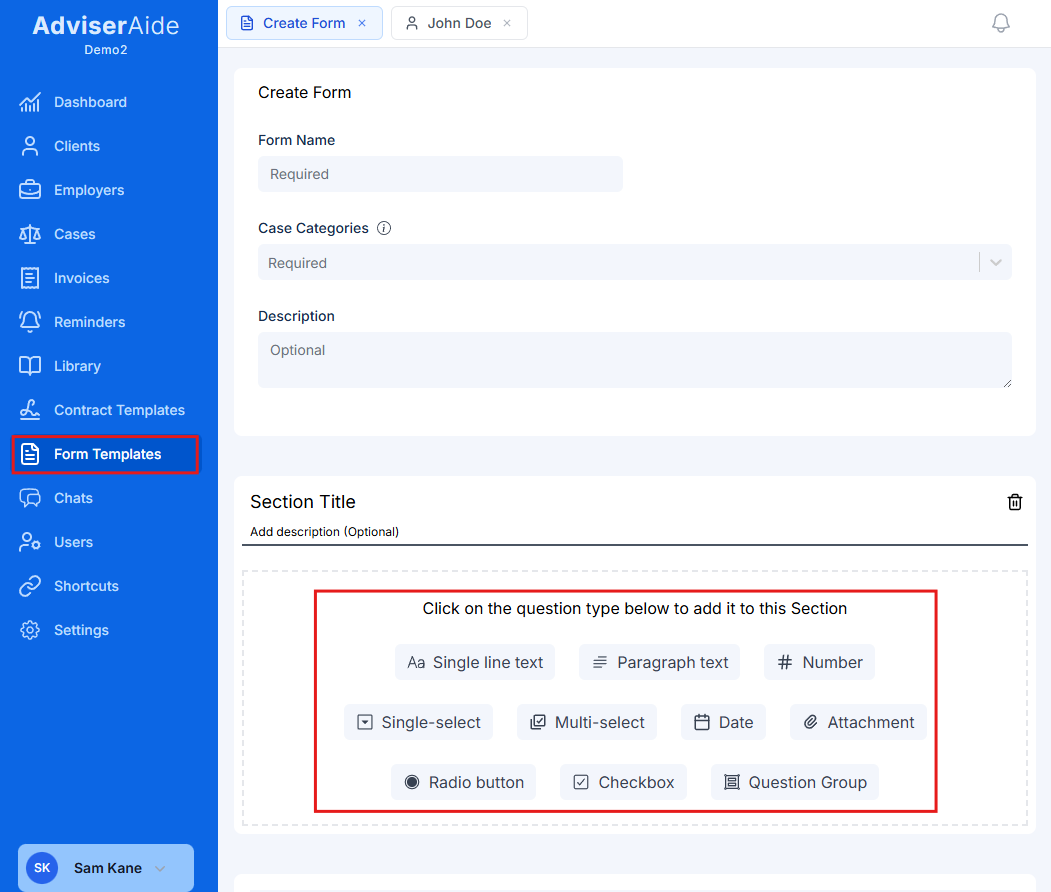
Looking for PDF forms? If you have an existing PDF document you want to digitize, see PDF Forms Overview to learn how to convert your PDF into an interactive, fillable form.
How advance forms work
- You build the form - Select question types (text, date, file upload, etc.), organize them into sections, and configure how they behave
- Assign to cases - Forms are automatically assigned to relevant cases based on categories you set
- Share with clients - Send forms to your clients through the client hub
- Clients complete - Your clients fill out the questionnaire and upload any requested documents
- Review responses - Access all submitted information directly in the case
Key capabilities
- Conditional logic - Show or hide questions based on previous answers (e.g., only ask about spouse details if client indicates they’re married)
- Question groups - Create repeatable sections where clients can add multiple entries (perfect for travel history, work experience, etc.)
- Document uploads - Request specific documents directly within the form, clients upload files that automatically save to the case
- Flexible question types - Use text fields, dropdowns, checkboxes, date pickers, file uploads, and more to collect exactly what you need
- Mobile-friendly - Forms automatically adapt to any device for easy completion
Common use cases
Advance forms are ideal for collecting structured information through questionnaires:- Travel history - Collect details about countries visited, dates, and purposes of travel
- Employment history - Gather information about current and previous jobs
- Family information - Record details about family members and relationships
- Document requests - Ask clients to upload specific documents like passports, certificates, or letters
- Case intake questionnaires - Collect comprehensive background information when opening a new case
- Education records - Gather details about qualifications and institutions attended
Advance forms must be categorized by case type. This ensures forms only appear for relevant cases when assigning them.
Creating an advance form
Navigate to forms section
Go to the Forms section from the main navigation menu.Click the Create Form button in the top right corner.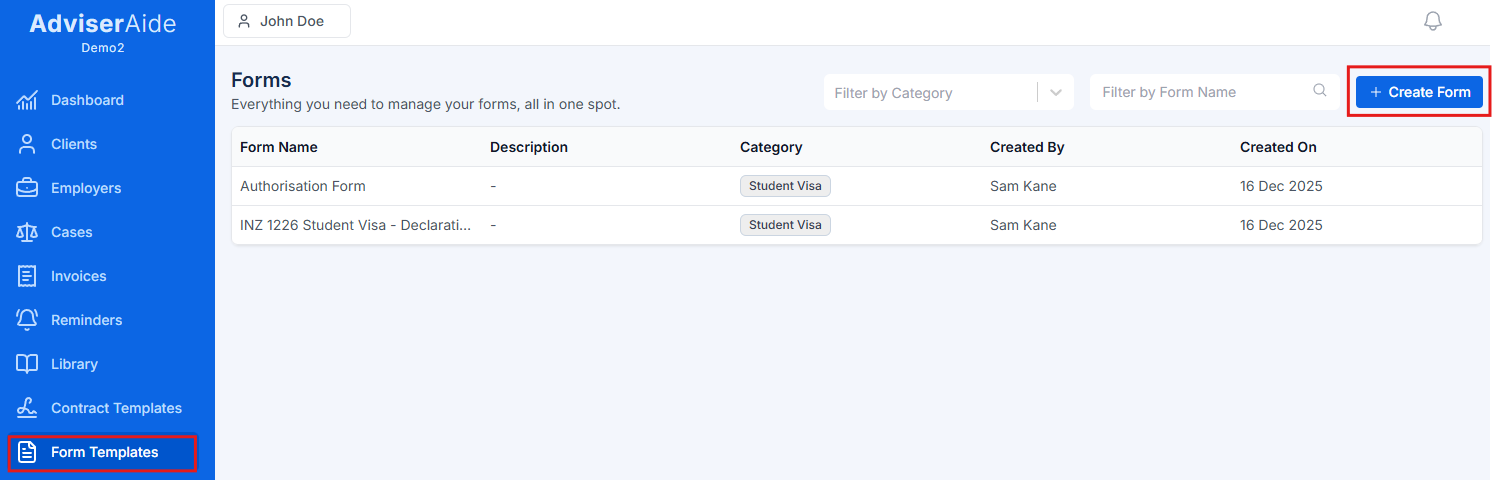
Select advance form option
Choose “Create an advance form” from the three form creation options.This option opens the advance form builder where you can create custom forms from scratch using various field types.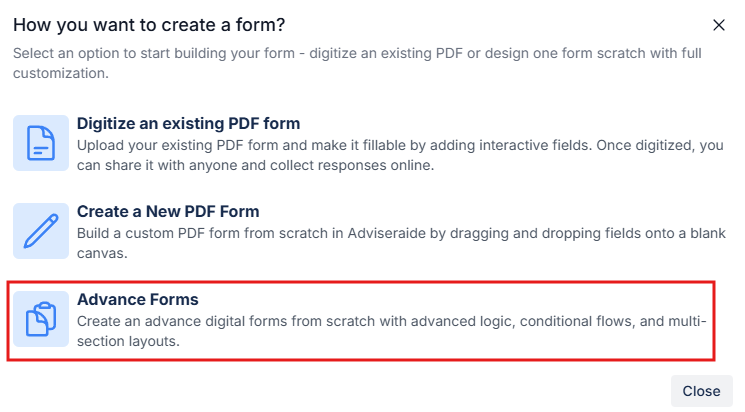
The other options are for digitizing existing PDF forms or creating forms with advanced conditional logic. This guide focuses on advance forms.
Enter form details
Provide the essential information about your form: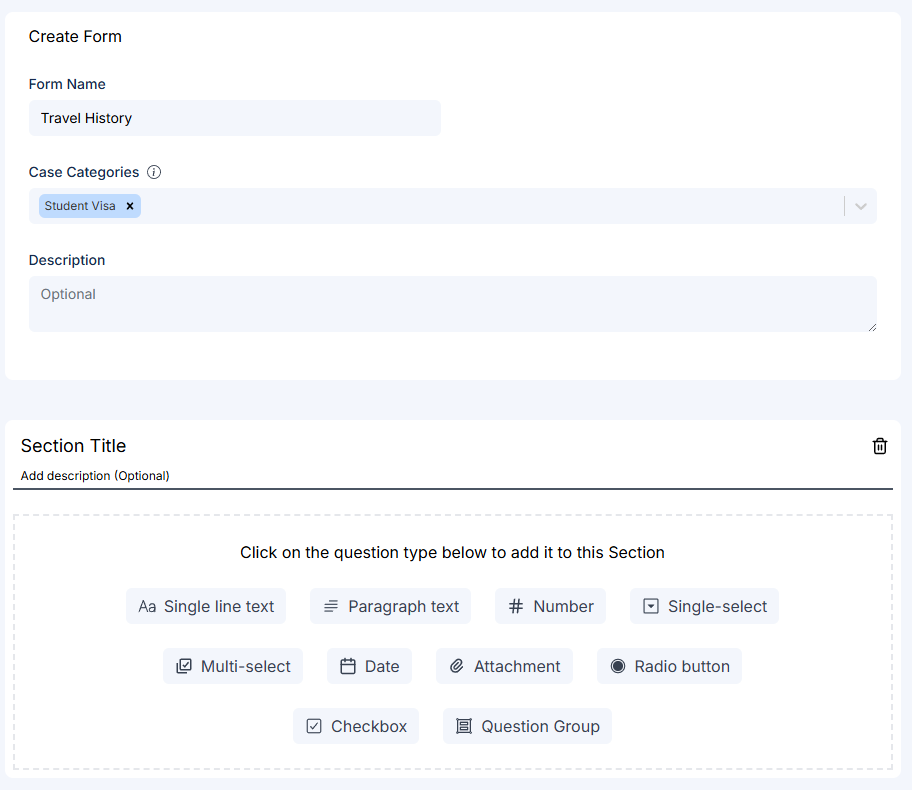
- Form Name (required) - Enter a clear, descriptive name (e.g., “Client Intake Questionnaire”, “Travel History Form”)
- Case Categories (required) - Select one or more case categories. The form will only be available for cases matching these categories.
- Description (optional) - Add notes about the form’s purpose or instructions for completion
Add your first section
Every advance form starts with one section. Sections help organize your form into logical groups of related questions.Click on “Section Title” to name your first section (e.g., “Personal Information”, “Contact Details”, “Travel History”).Optionally, add a section description to provide context or instructions for the questions in this section.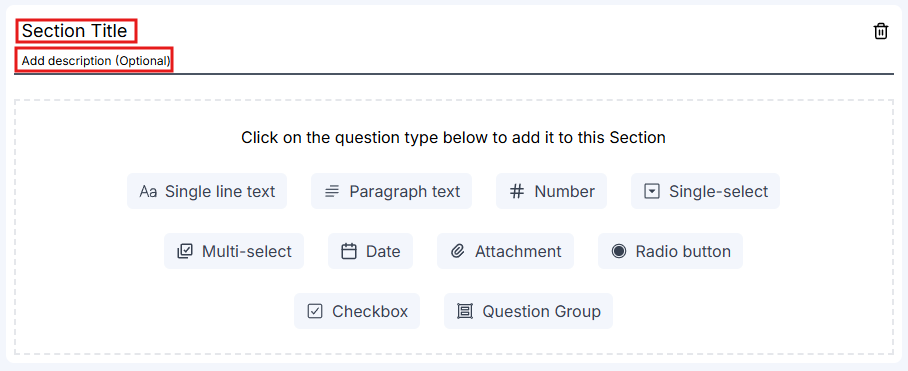
Add fields to your section
Click on any field type button to add that field to your section. The available field types are displayed at the bottom of each section.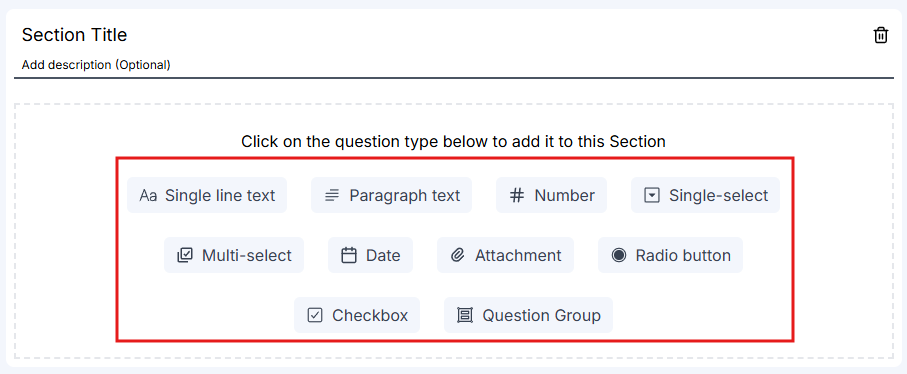 The following field types are available:
- Single line text - For brief text responses like names, email addresses, or short answers
- Paragraph text - For longer text responses like descriptions or explanations
- Number - For numeric values like age, quantity, or amounts
- Single-select - Dropdown menu where users select one option from a list
- Multi-select - Dropdown menu where users can select multiple options
- Date - Calendar picker for selecting dates
- Attachment - Allows users to upload files or documents
- Radio button - For yes/no questions or selecting one option from visible choices
- Checkbox - For selecting multiple options from visible choices
- Question Group - Special field for repeatable sets of questions (explained in detail below)
For detailed examples and best practices for each field type, including when to use each one, see the Advance Form Field Types guide.
Configure your field
After adding a field, it automatically enters edit mode. Configure the field by filling in: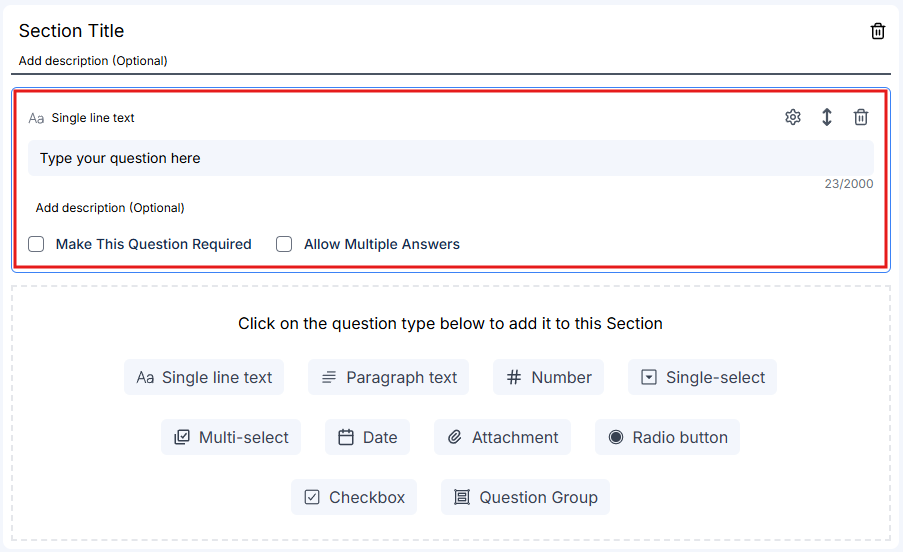 For fields that support options (radio buttons, checkboxes, single-select, multi-select), you’ll also need to:
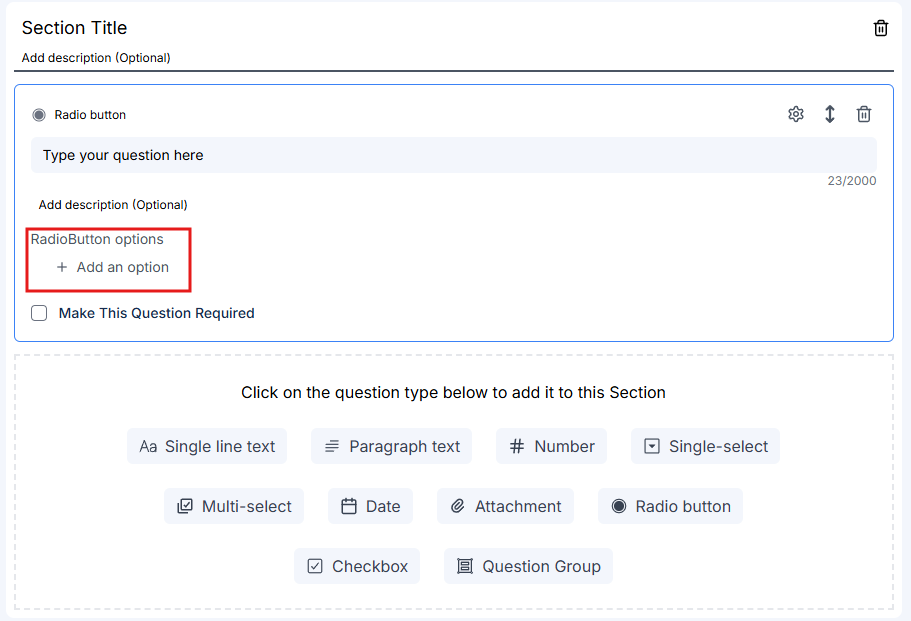 At the bottom of each field, you can:
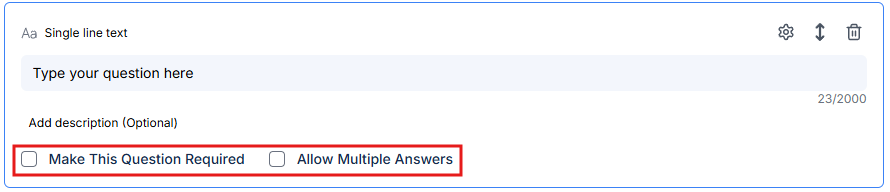
- Question (required) - The question or label for this field
- Description (optional) - Additional instructions or context for the question
- Add option values by typing them in
- Click “Add an option” to add more choices
- Delete unwanted options using the X button
- Make This Question Required - Check this to require an answer before form submission
- Allow Multiple Answers - Available for certain field types, allows multiple entries for the same question
Click outside the field to exit edit mode and save your changes. Click on any field again to re-enter edit mode.
Add more fields and sections
Continue building your form by: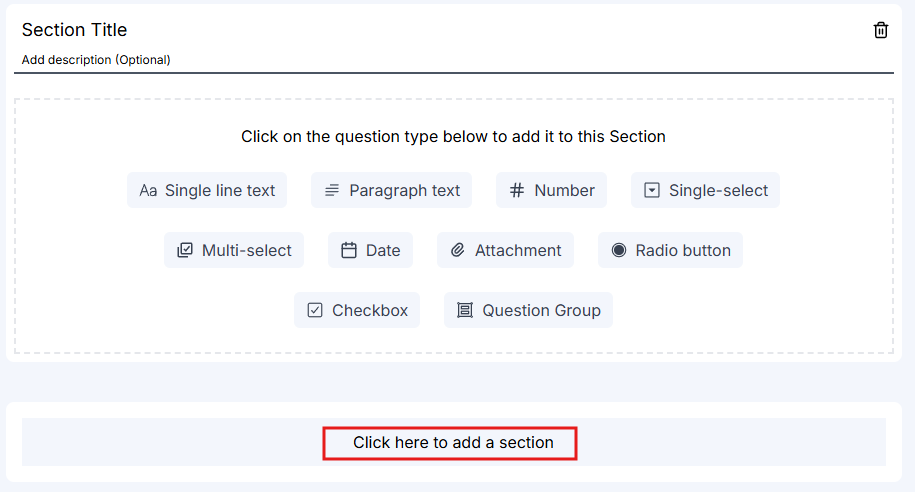 You can add as many sections and fields as needed to collect all required information.
- Adding more fields - Click additional field types to add more questions to the current section
- Adding more sections - Click “Click here to add a section” to create a new section
Save your form
When you’ve finished adding all sections and fields, click the “Create Form” button at the bottom of the page.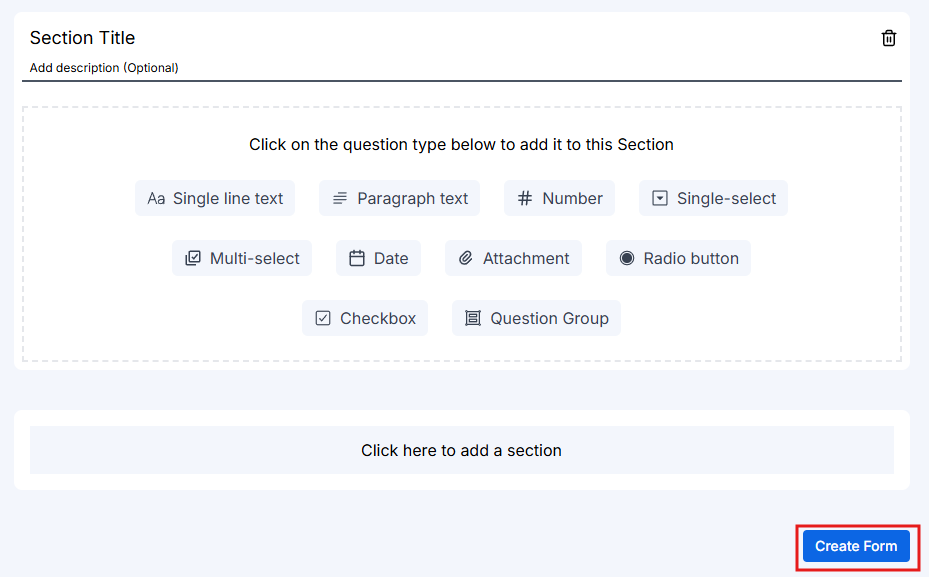
You’ll see a success message confirming your form has been created. The form is now saved to your forms library.
Assign the form to a case
Once your form is created, you can assign it to existing cases:
- Navigate to the case profile
- Click on the Forms tab
- Click Assign Form to select from available forms
- Choose your newly created form from the list
Automatic assignment: When creating a new case, forms that match the case category are automatically assigned. This ensures clients always have the right forms to complete from the start.
Share the form with your client
After assigning the form to a case, share it with your client:
- From the case profile, go to the Forms tab
- Click Share Form next to the form you want to send
- A unique link is generated for the form
- You can email this link to your client:
- Use the email feature within the case to send the link directly
- Or copy the link and send it via your preferred email client
- The form will become visible in the client hub
- Your client can access and complete the form using the link or through their client hub
Once shared, clients can fill out the questionnaire and upload any requested documents directly through their client hub.
Client completes the form
After you share the form, your client can fill it out at their convenience:Device flexibility: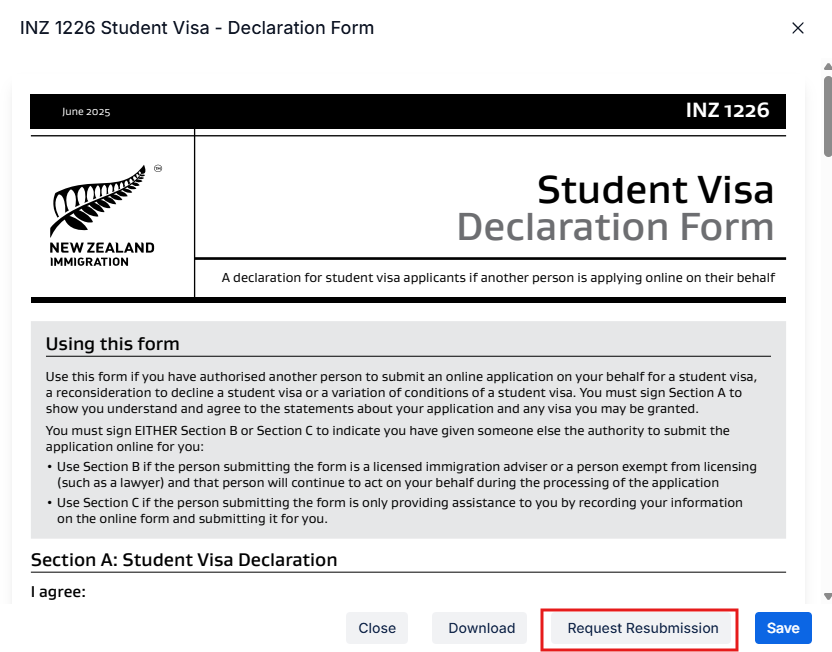 What happens after submission:Once the client submits the form, several automatic actions occur:
- Clients can complete forms on any device: PC, tablet, or mobile phone
- Over 90% of forms are completed on mobile phones, making mobile accessibility a key feature
- Save as draft - Clients can save their progress and return later to finish
- Submit - Once all required fields are completed, clients can submit the form
- Go to the case profile
- Open the Forms tab and then open the completed form.
- Click Request Resubmission
- The form will reopen for the client to make changes
- The client can either:
- Use the original link they received
- Or you can click Share Form again to generate and send a new link
- Email notification - You receive an email confirming the client has completed the form
- PDF generation - A PDF copy of the completed form is automatically generated and saved to the case documents
- Status update - In the Forms tab, the form status changes to “Completed”
All submitted responses and uploaded documents are immediately available in the case for your review.
Advanced form features
Now that you know the basics of creating forms, explore these powerful features to make your forms even more dynamic and efficient:Conditional fields
Create smart forms that adapt to user responses by showing or hiding questions based on previous answers. For example, only show spouse details if the client answers “Yes” to having a spouse. Learn how to set up conditional logic in the Conditional Fields guide.Question groups
Collect multiple entries for the same set of questions, perfect for travel history, employment records, or education background. Clients can add as many entries as they need using the “Add more” button. See how to create repeatable question groups in the Advance Form Field Types guide.For detailed information about all available field types and when to use each one, see the Advance Form Field Types guide.
Moving fields
You can reorganize your form at any time by repositioning fields within sections. To move a field:- Click the move icon (up/down arrows) on the field you want to reposition
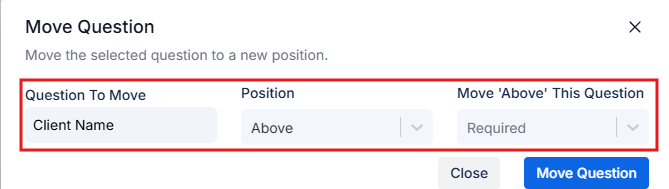
- In the Move Question modal, you’ll see:
- The question you’re moving
- Position dropdown: Select “Above” or “Below”
- Move Above/Below This Question dropdown: Select the target question
- Click Move Question to confirm
Best practices
- Use required fields sparingly - Only mark fields as required if the information is absolutely necessary. Optional fields increase completion rates.
- Categorize forms correctly - Always select the appropriate case categories to ensure forms appear for relevant cases when assigning them.
- Choose the right field types - Use the most specific field type available. Number fields for numbers, date fields for dates, etc. This improves data quality and user experience.
- Break long forms into sections - Organize forms into logical sections to make them less intimidating and easier to complete.
- Utilize question groups for repeatable data - Use question groups whenever clients might have multiple entries (travel history, employment, etc.). This provides much better data structure than a single text field.
Frequently asked questions
Can I add a signature field to advance forms?
Can I add a signature field to advance forms?
Signature fields are not currently available for advance forms. However, you can use a checkbox field as a workaround to collect client acknowledgment.Workaround approach:Create a checkbox field with a question like “Declaration and Signature” and add a detailed description that includes your disclaimer text. For example:“I hereby declare that the information provided in this form is true, accurate, and complete to the best of my knowledge. I understand that providing false or misleading information may result in the refusal of my application or other legal consequences.”This approach ensures clients acknowledge the accuracy of their submitted information, similar to signing a declaration.
Next steps
Advance Form Field Types
Explore all available field types and learn when to use each one, including question groups.
Conditional Fields
Create dynamic forms that show or hide questions based on user responses.
PDF Forms Overview
Learn how to digitize existing PDF documents into interactive forms.