Creating a password for your account
Access the password setup page
Click here to access the password setup page. You’ll see the following User Detail page - just enter your email address and select Send Verification Code. If the link above doesn’t work, you can visit app.adviseraide.com and use the Forgotten password option to setup your password.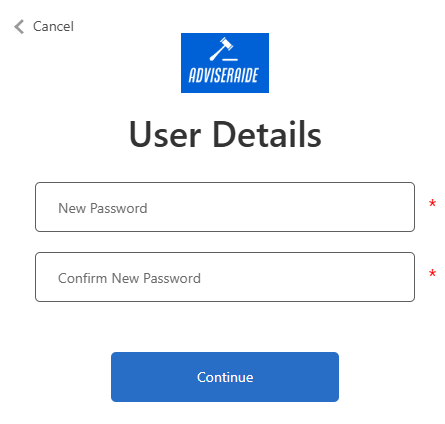
Enter verification code
Check your email for the verification code, then enter it to confirm your email and move forward.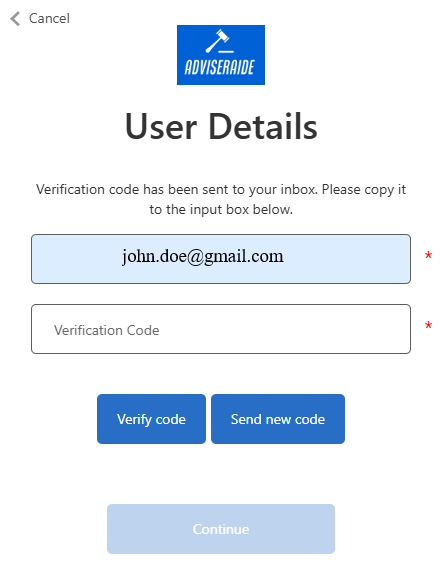
Continue to next step
Once your email is verified, you’ll be taken to the next page. Just click Continue to move on.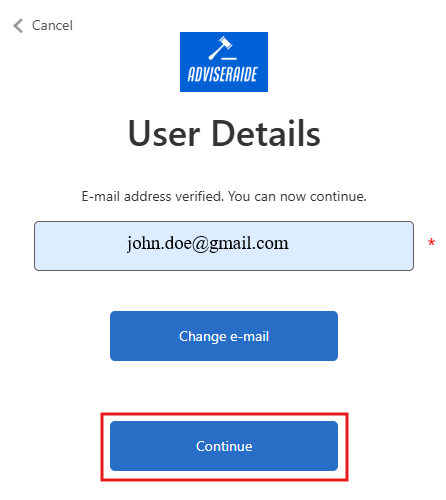
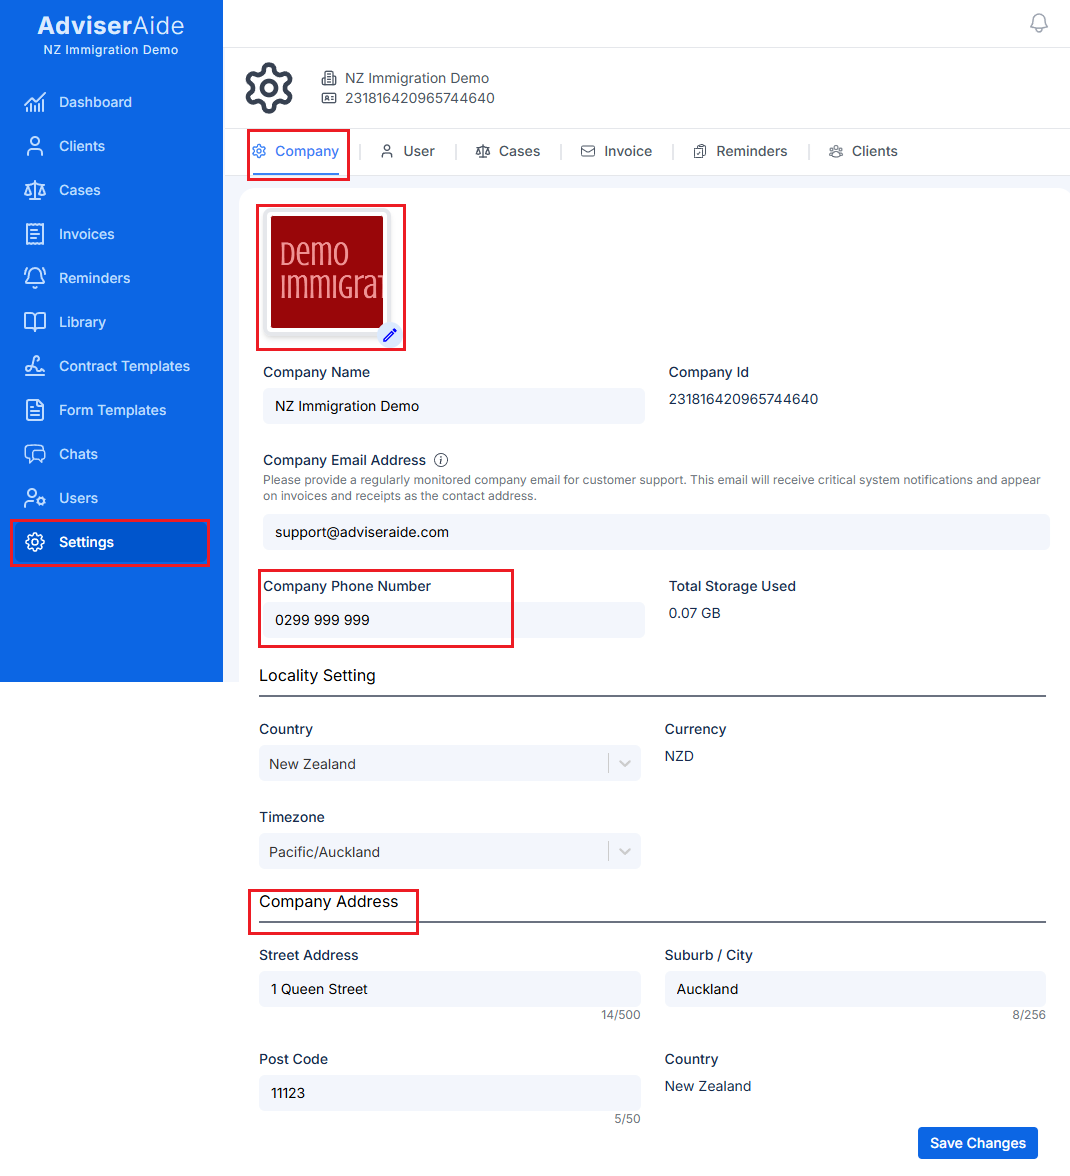
Company Settings
Once you’ve set up your password, please log in to Adviseraide by going to app.adviseraide.com. Head over to the settings and complete your company profile by providing:- Company Logo
- Company Phone Number
- Company Address → Address is printed on Invoice and advance payment Pdf files.
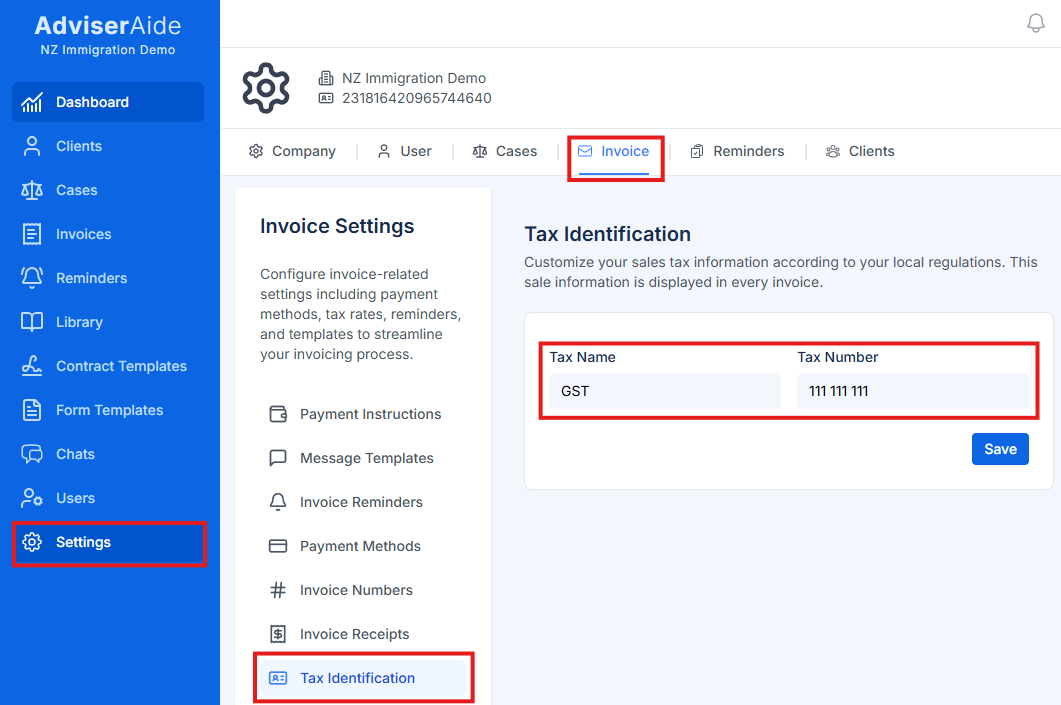
Invoice Settings
If you plan to send invoices, add payment instructions in the invoice settings and enter your GST number (if applicable). This step is optional and only needs to be completed once you start invoicing clients. The payment instructions you provide will automatically appear on the PDF invoices sent to your clients.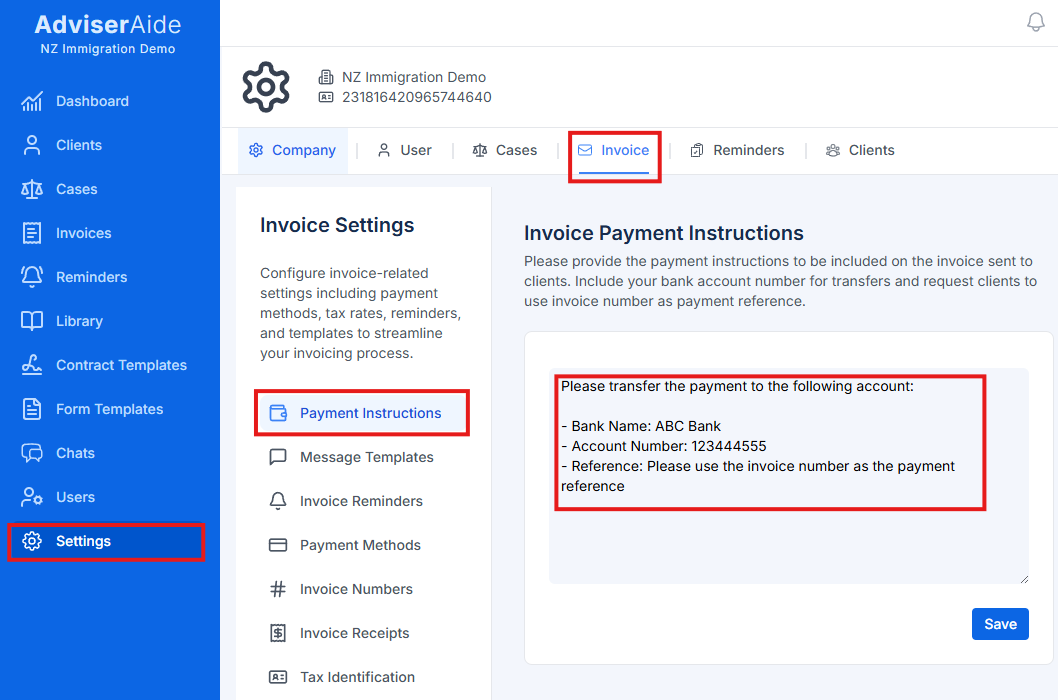
Next Step
Creating a Client
Learn how to create a new client in AdviserAide
If you have any questions or need assistance, send us an email at support@adviseraide.com , and we will be happy to assist you.