From a case's Finance tab
When viewing a case profile, go to the Finance tab and click Create Invoice. Adviseraide automatically links the new invoice to that case.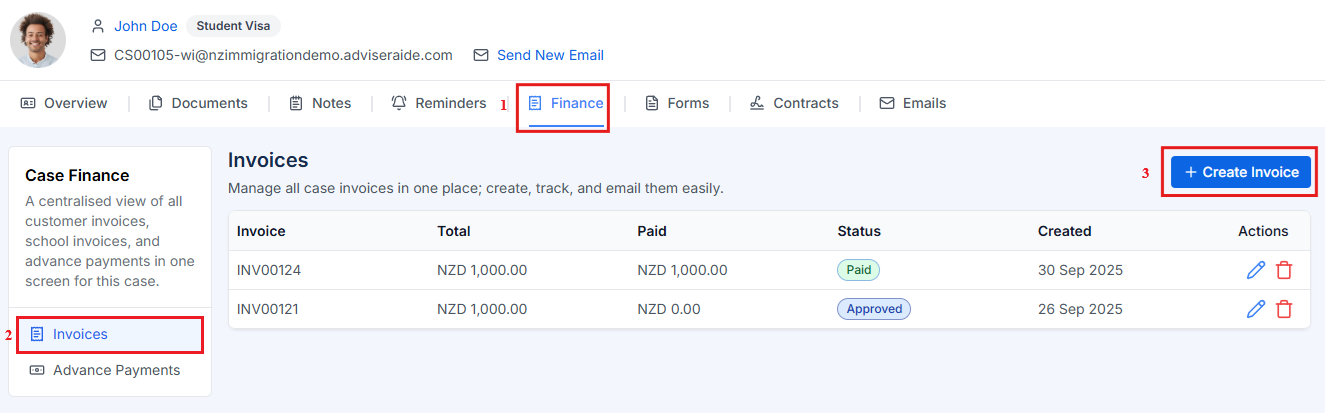
From the Invoices page
Click Invoices in the left-hand menu and then click Create Invoice. This opens a blank invoice form where you select the client and case (if applicable)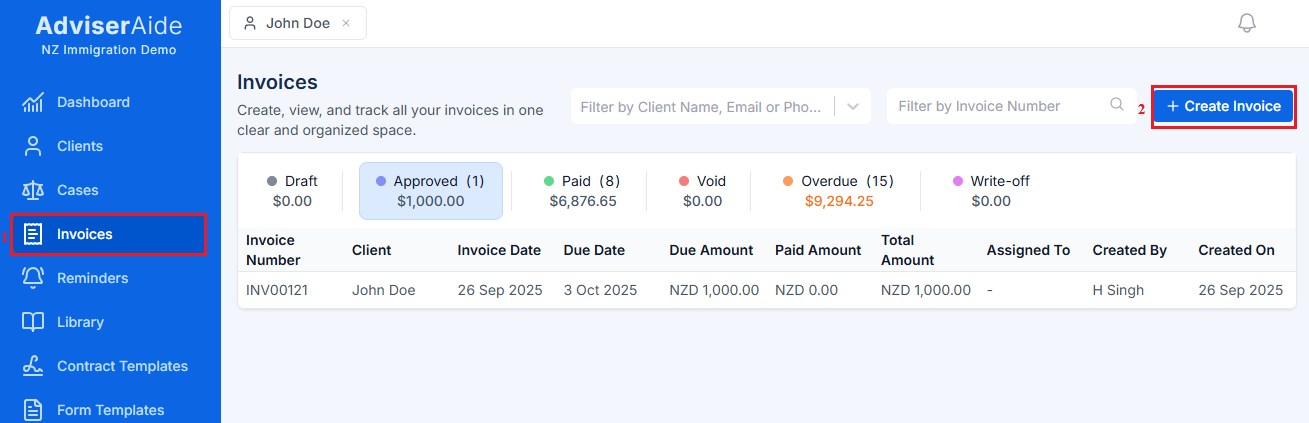
Fill in the invoice details
Once you click on the create invoice button you will be redirected to the following create invoice page.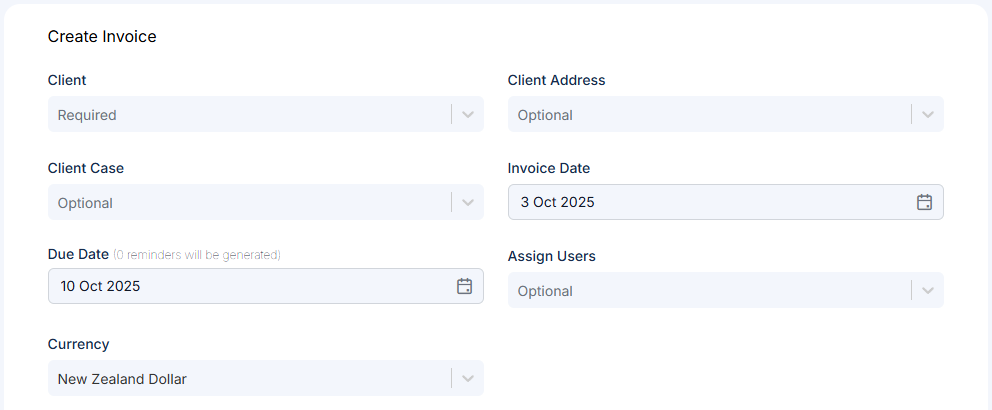 The create invoice page includes the following fields:
- Client – Select the client. You can also specify a Client Address if needed. If you start from a case’s finance tab, the client and case fields are pre-filled.
- Client Case – Optional. Link the invoice to a specific case so the invoice appears in the case’s finance tab.
- Invoice Date - This can be set to the current day or to a past date if you need to reflect when the case or services were actually provided.
- Due Date - The due date is set to 7 days by default. It is also used by the automated invoice reminder system. Your account is set up with 4 reminders, which you can view or adjust on the reminder settings page when you are logged in.
- Currency – Invoices default to the currency setup in the company settings, but this can be changed for each invoice. Please note that the financial amount shown on the dashboard always reflects the company-level currency and does not currently adjust for different invoice currencies. Soon, invoice amounts will be automatically converted to the company currency and displayed on the dashboard.
- Assign Users – Assign responsibility to one or more advisers.
- Invoice Message – Add custom text that appears on the invoice PDF. You can save reusable message templates to speed up future invoices.
Invoice line items
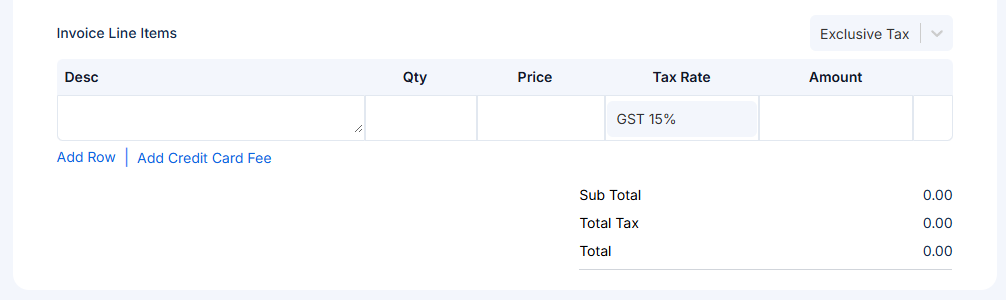
- Description – What the line covers (e.g., visa application fee, consultation).
- Quantity and Price – Number of units and cost per unit.
- Tax Rate – Adviseraide applies the correct GST/VAT based on your invoice settings.
Save & Approve the invoice

Review the invoice
Once you save the invoice, a new screen will open showing the invoice you created. From here, you can review and make changes if needed.
Email the invoice to your client
To do this, click the Email button in the top header. This opens the following email screen, where the left side shows the email body and the right side shows a preview of the invoice PDF that will be sent. When ready, click Send Email to send the invoice to your client.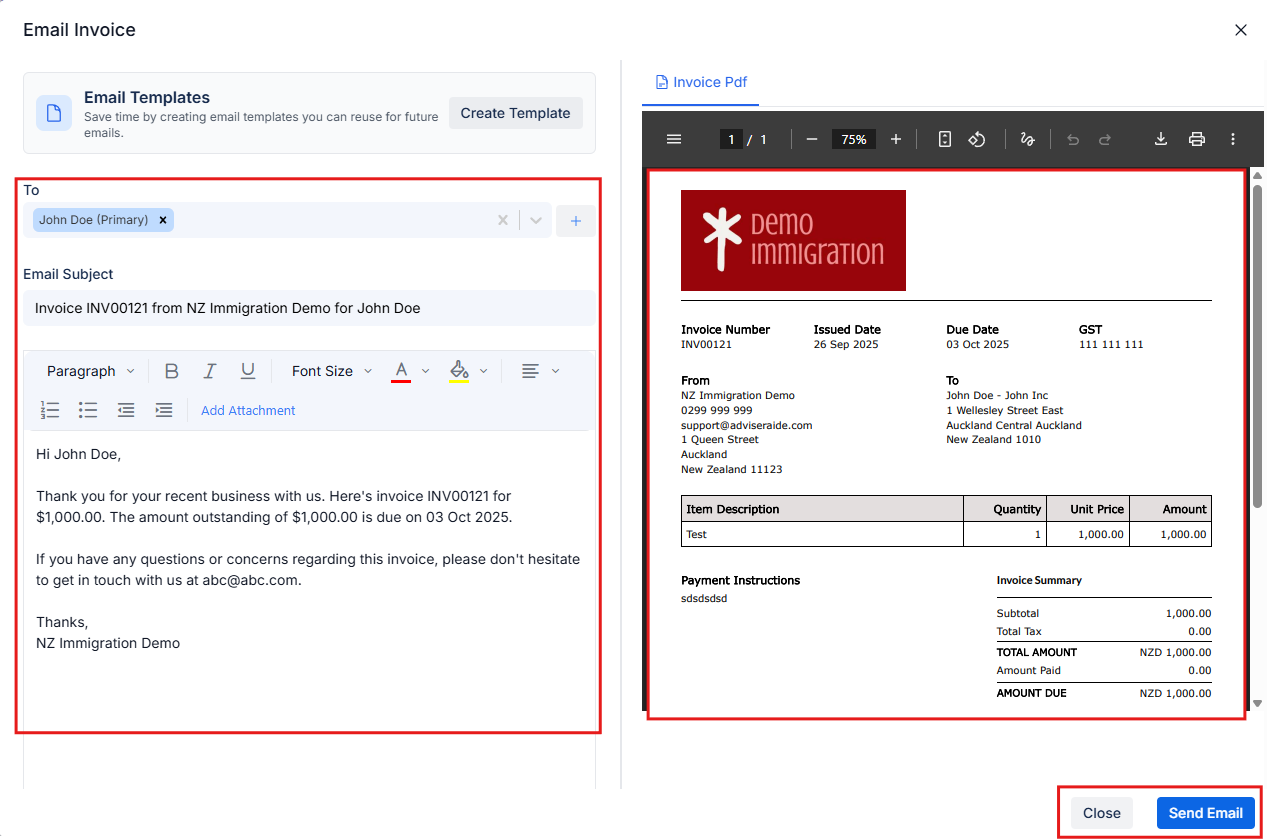
Next Step
Adding Payment and Sending Receipt
Learn how to record payments and send receipts to your clients.