Creating a PDF form
Navigate to forms section
Go to the Forms section from the main navigation menu.Click the Create Form button in the top right corner.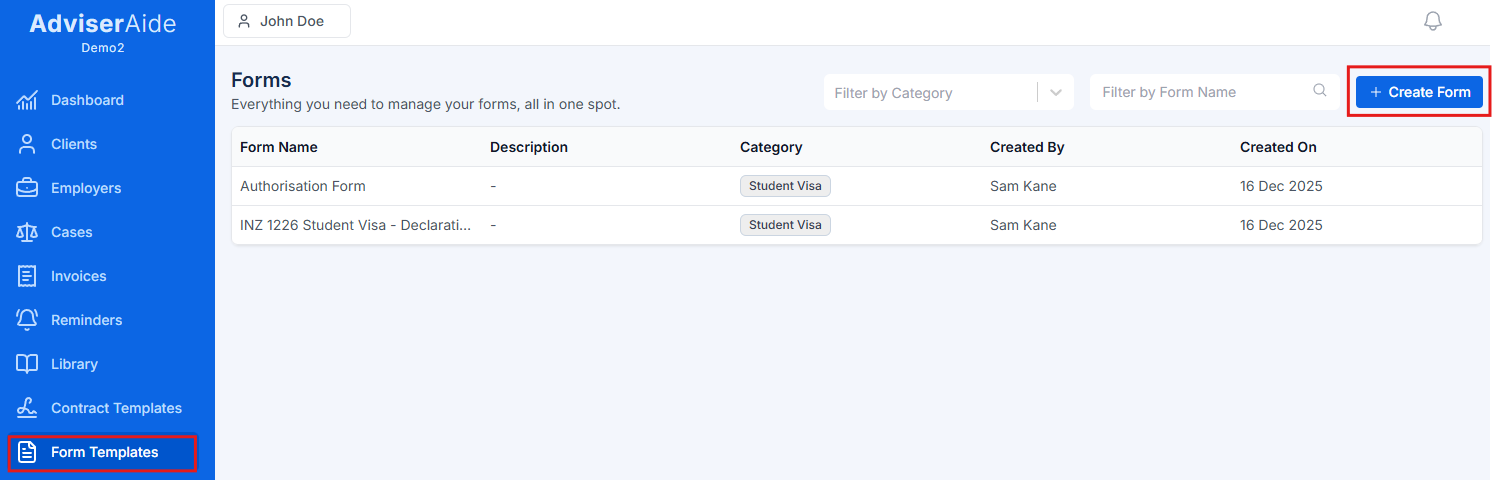
Select PDF form option
Choose “Digitize an existing PDF form” from the three form creation options.This option allows you to upload an existing PDF document and convert it into an interactive form.
The other options are for creating advance forms from scratch or forms with advanced conditional logic. This guide focuses on digitizing existing PDFs.
Enter form details and upload PDF
Provide the essential information about your form and then click Next - Pdf Form Builder: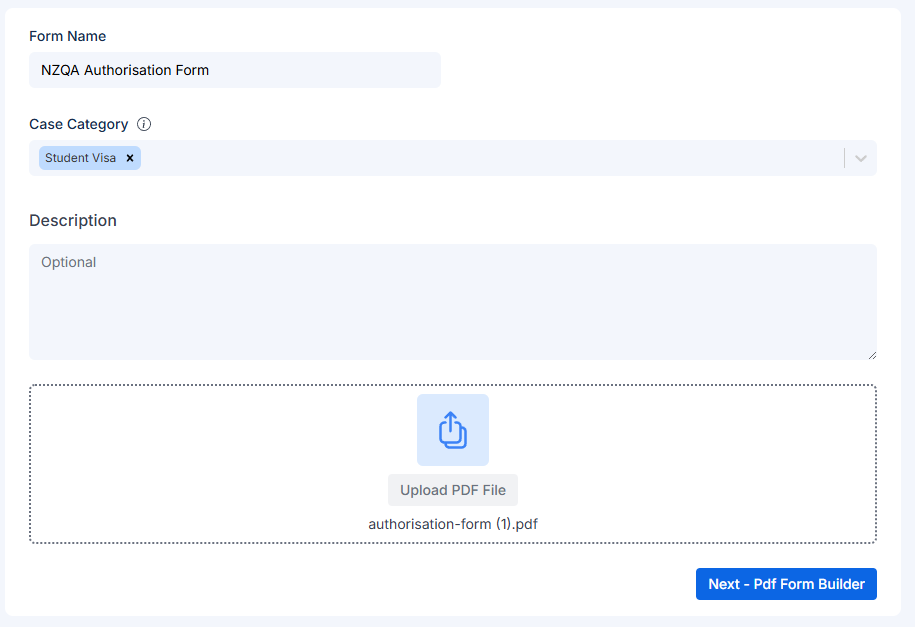
- Form Name (required) - Enter a clear, descriptive name (e.g., “INZ 1226 - Authority to Act”, “Form 956 - Migration Agent Authority”)
- Case Categories (required) - Select one or more case categories. The form will only be available for cases matching these categories.
- Description (optional) - Add notes about the form’s purpose or instructions for completion
You’ll be redirected to the PDF Form Builder once processing is complete. You’ll see your PDF pages displayed in the center canvas area.
Add interactive fields
Now you can make your PDF interactive by adding fillable fields.The PDF Form Builder has three main panels: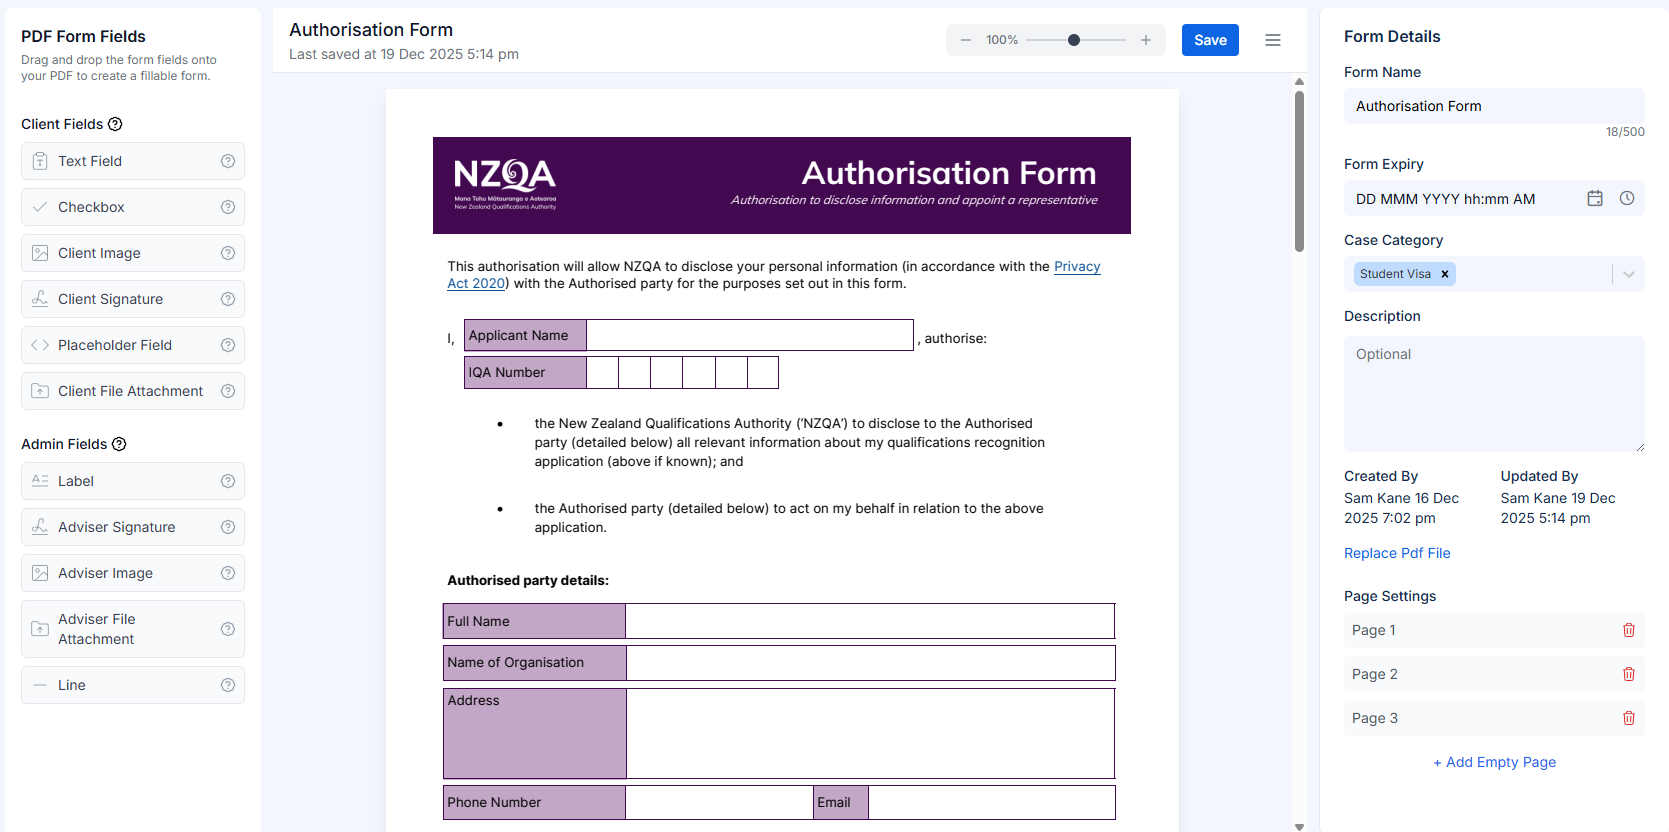 Left panel - Contains all available field types you can drag onto your PDF
Center canvas - Displays your PDF where you’ll add and position fields
Right panel - Shows properties and settings for selected fieldsTo add a field:
Left panel - Contains all available field types you can drag onto your PDF
Center canvas - Displays your PDF where you’ll add and position fields
Right panel - Shows properties and settings for selected fieldsTo add a field:
- Select a field type from the left panel (e.g., Text, Checkbox, Signature)
- Drag it onto the PDF canvas in the center
- Drop it where you want the field to appear
- Resize and position the field by dragging its edges or corners
For detailed information about all available field types and when to use each one, see the PDF Form Field Types guide.
Configure field properties
After adding a field, click on it to configure its properties in the right panel.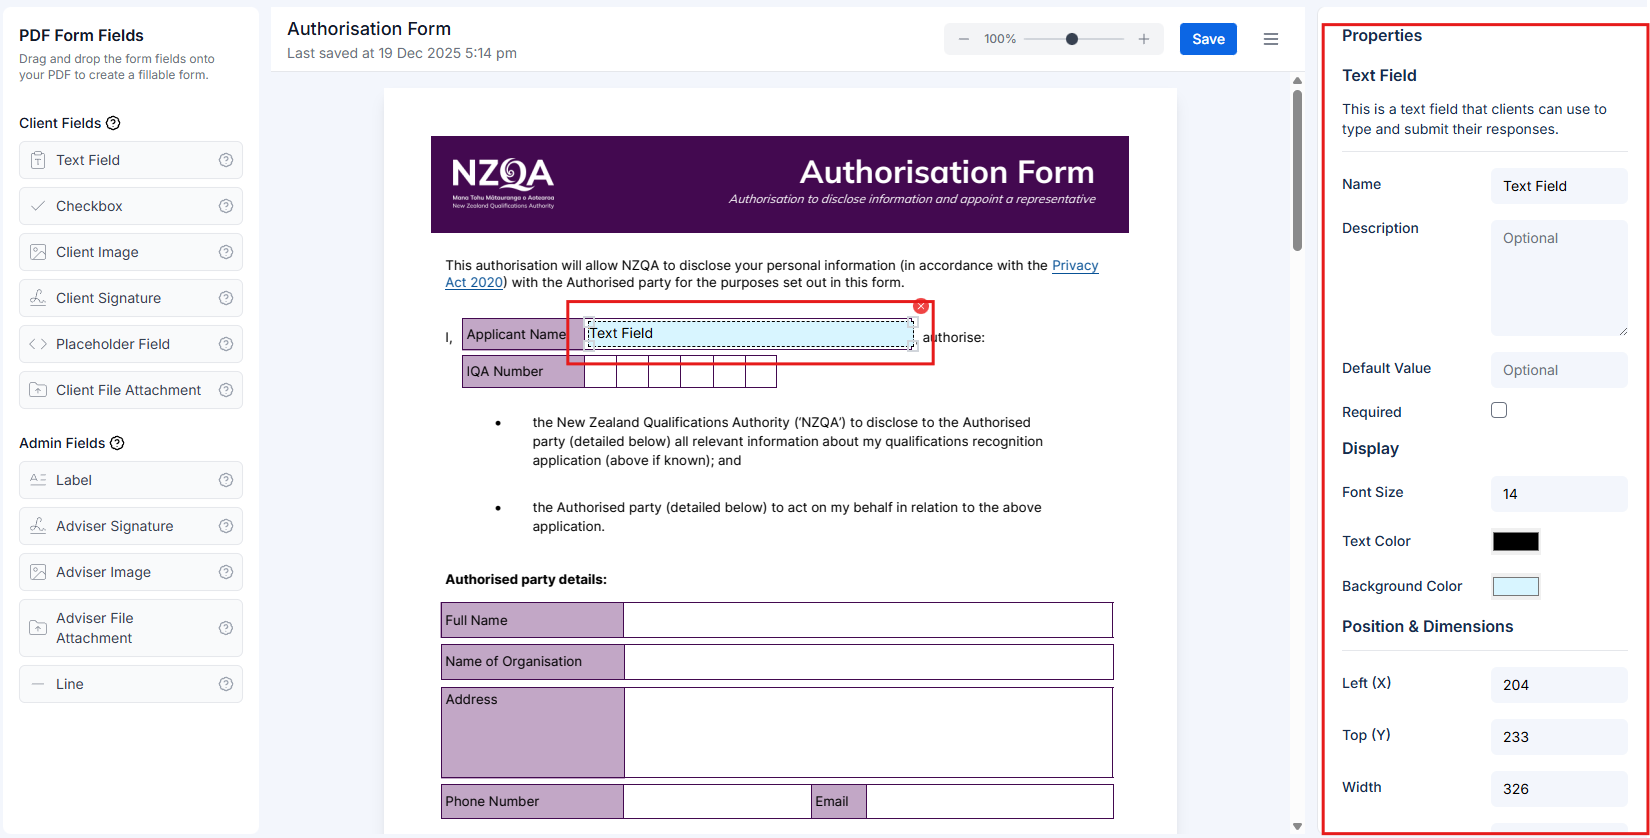 You can configure:
- Label/Question - The text that indicates what information is needed
- Helper text - Additional instructions or examples
- Position & dimensions - Exact placement and size
- Display settings - Colors, font size, borders
- Field-specific options - Varies by field type (e.g., multi-line for text, default state for checkboxes)
Assign the form to a case
Once your form is created, you can assign it to existing cases:
- Navigate to the case profile
- Click on the Forms tab
- Click Assign Form to select from available forms
- Choose your newly created PDF form from the list
Automatic assignment: When creating a new case, forms that match the case category are automatically assigned. This ensures clients always have the right forms to complete from the start.
Share the form with your client
After assigning the form to a case, share it with your client:
- From the case profile, go to the Forms tab
- Click Share Form next to the form you want to send
- A unique link is generated for the form
- You can email this link to your client:
- Use the email feature within the case to send the link directly
- Or copy the link and send it via your preferred email client
- The form will become visible in the client hub
- Your client can access and complete the form using the link or through their client hub
Once shared, clients can fill out the form and upload any requested documents directly through their client hub.
Client completes the form
After you share the form, your client can fill it out at their convenience:Device flexibility: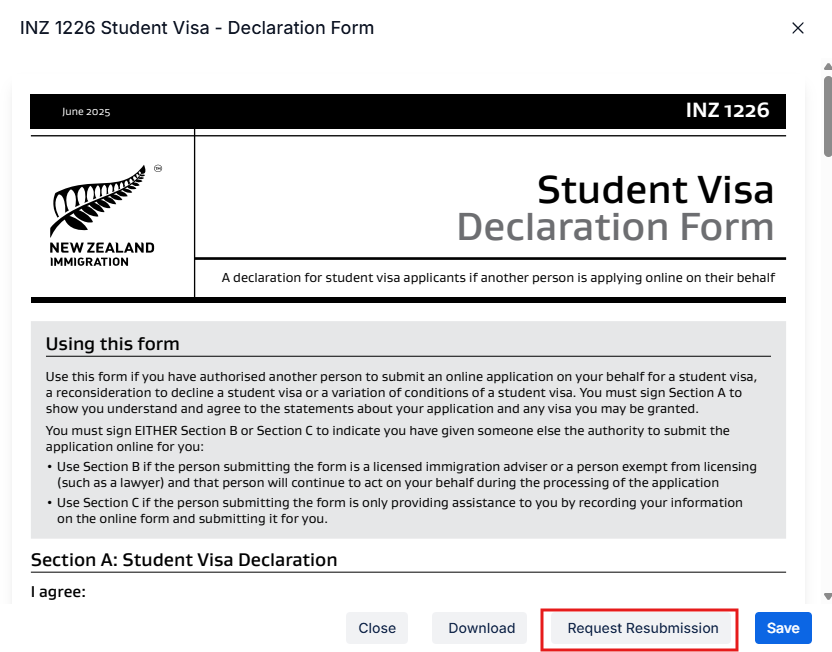 What happens after submission:Once the client submits the form, several automatic actions occur:
- Clients can complete forms on any device: PC, tablet, or mobile phone
- Over 90% of forms are completed on mobile phones, making mobile accessibility a key feature
- Save as draft - Clients can save their progress and return later to finish
- Submit - Once all required fields are completed, clients can submit the form
- Go to the case profile
- Open the Forms tab and then open the completed form
- Click Request Resubmission
- The form will reopen for the client to make changes
- The client can either:
- Use the original link they received
- Or you can click Share Form again to generate and send a new link
- Email notification - You receive an email confirming the client has completed the form
- PDF generation - A PDF copy of the completed form is automatically generated and saved to the case documents
- Status update - In the Forms tab, the form status changes to “Completed”
All submitted responses and uploaded documents are immediately available in the case for your review.
Next steps
PDF Form Field Types
Explore all available field types and learn when to use each one.
PDF Forms Overview
Learn more about PDF forms and common use cases.