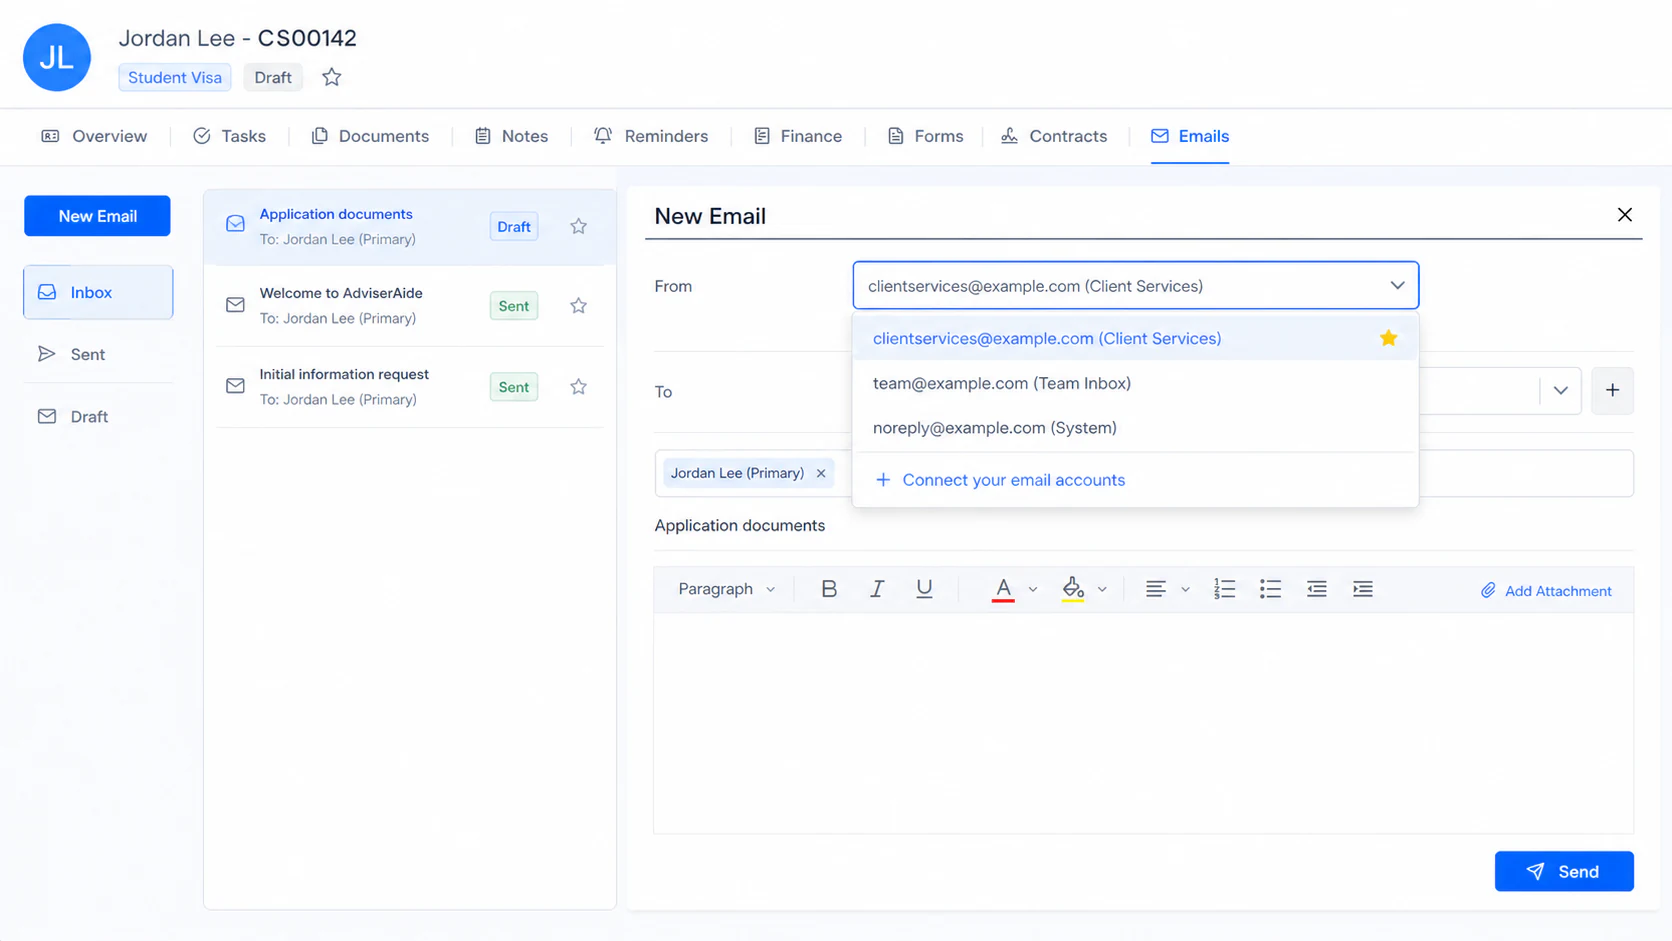
Connect Gmail or Outlook so relevant messages and attachments can be kept with AdviserAide cases.
Think of the Gmail and Outlook integration as automatic email filing. You can keep sending emails from Gmail.com or Outlook as you normally do. If you email John and include an attachment, AdviserAide pulls the sent email and attachment into John’s case when his email address matches a client who has one open case.When John replies, AdviserAide also pulls in his reply and keeps it with the same case. If John has more than one open case and AdviserAide cannot tell which one the email belongs to, it appears under Unmatched Emails. Choose the correct case and select Link to Case.You no longer need to forward each email to the case email address just to save it in AdviserAide. Your client emails and attachments are kept with the case while you continue using Gmail or Outlook.
You need Manage Email Accounts permission to connect and manage email accounts. If the Email settings tab is not available, ask your administrator or contact AdviserAide Support.
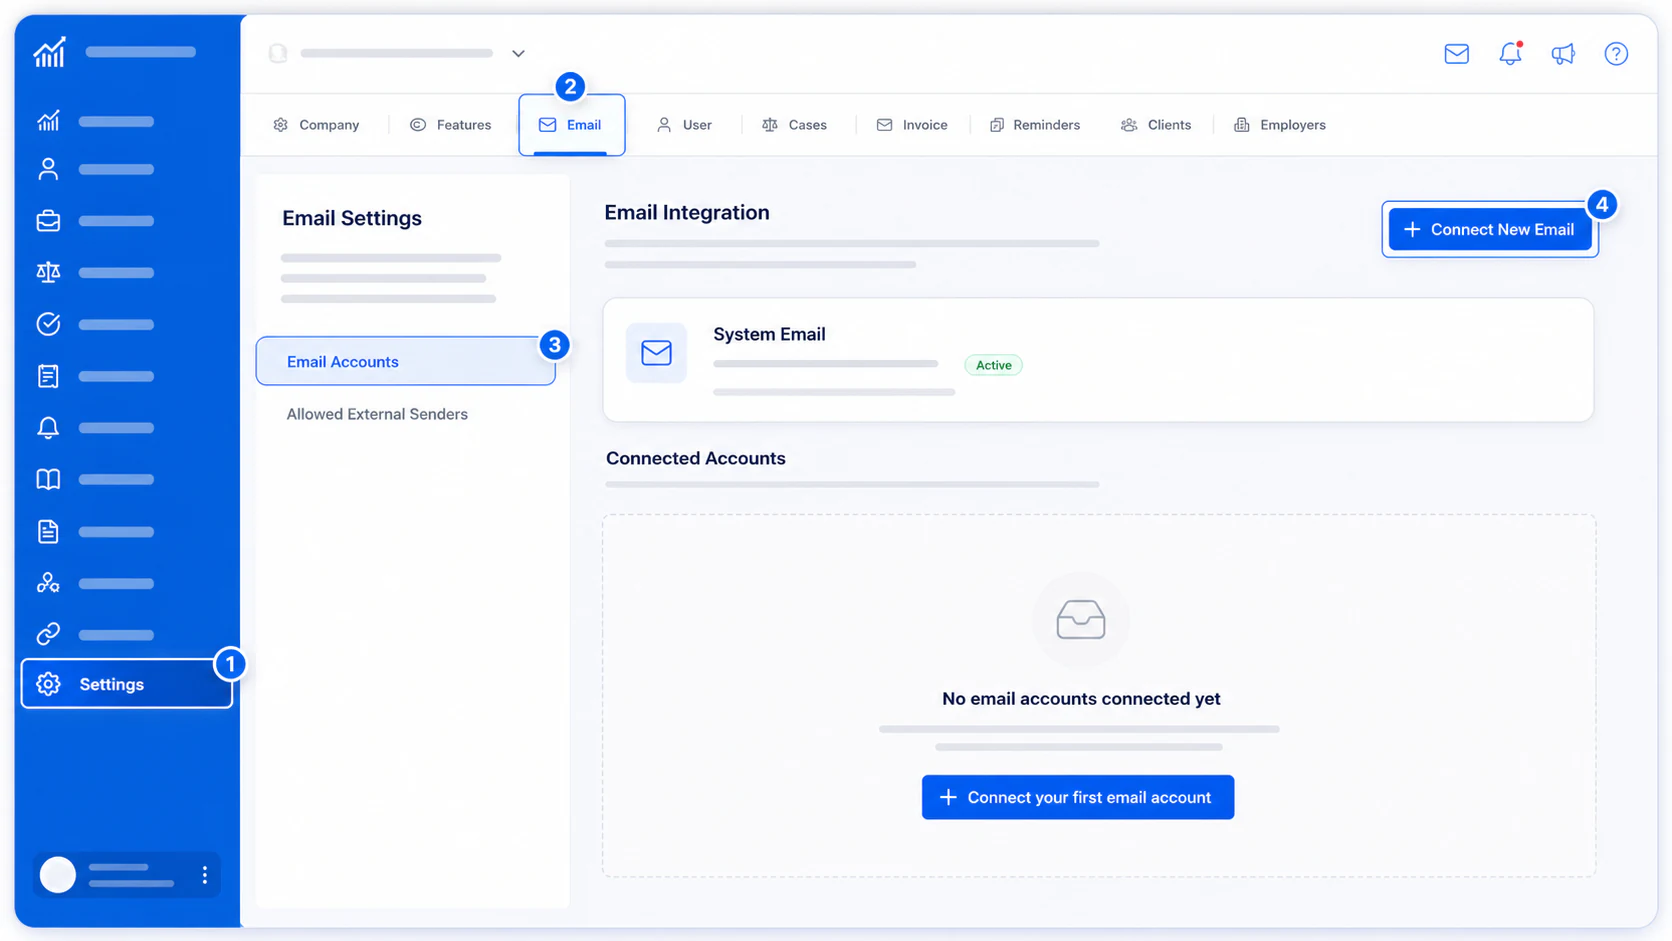
Open Settings, select Email at the top, then select Email Accounts. Select Connect New Email.
Open Email Accounts from Settings and connect a new account
2
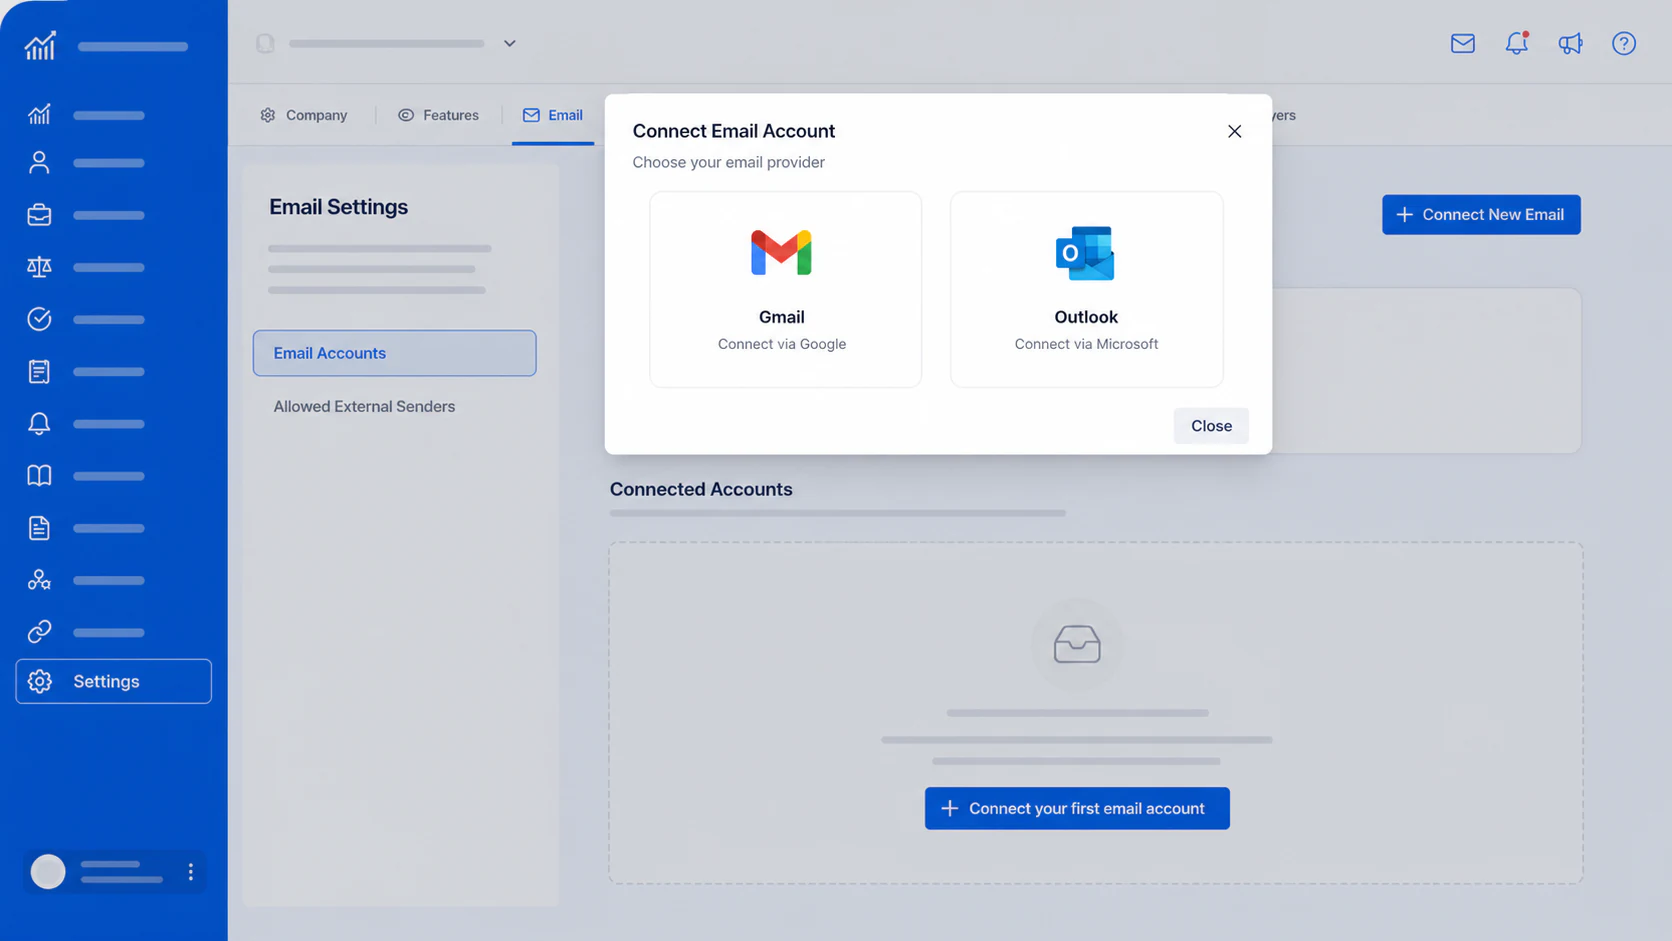
Choose Gmail or Outlook
Select the provider for the email account you want to connect.
Choose Gmail or Outlook
Zoho, Yahoo and Other / SMTP choices appear only when SMTP/IMAP accounts have been enabled for your organisation. See SMTP/IMAP for details.
3
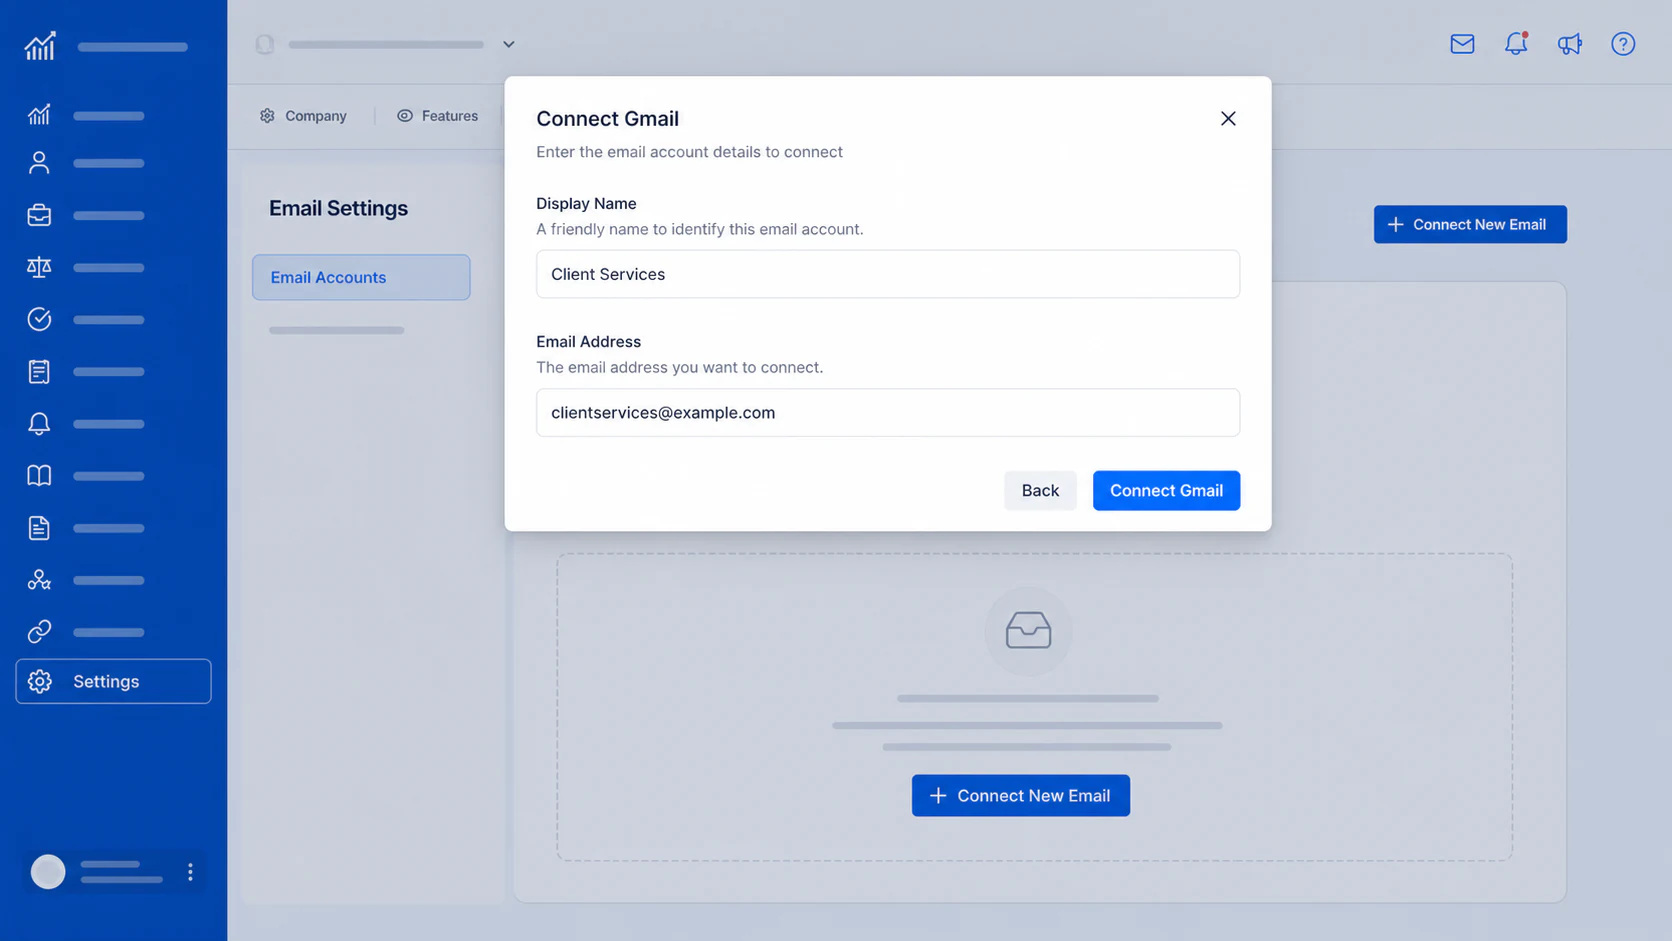
Enter the account details
Enter:
Display Name - A friendly name that helps users recognise the account later, such as Client Services or Maria's work email.
Email Address - The Gmail or Outlook address you want to connect.
Select Connect Gmail or Connect Outlook.
Enter a display name and the email address to connect
4
Sign in to your email provider
Gmail or Microsoft opens its sign-in page. Sign in using the same email address you entered in AdviserAide and approve the connection.When the connection is complete, you are returned to AdviserAide and the new account opens automatically.
5
Review the account settings
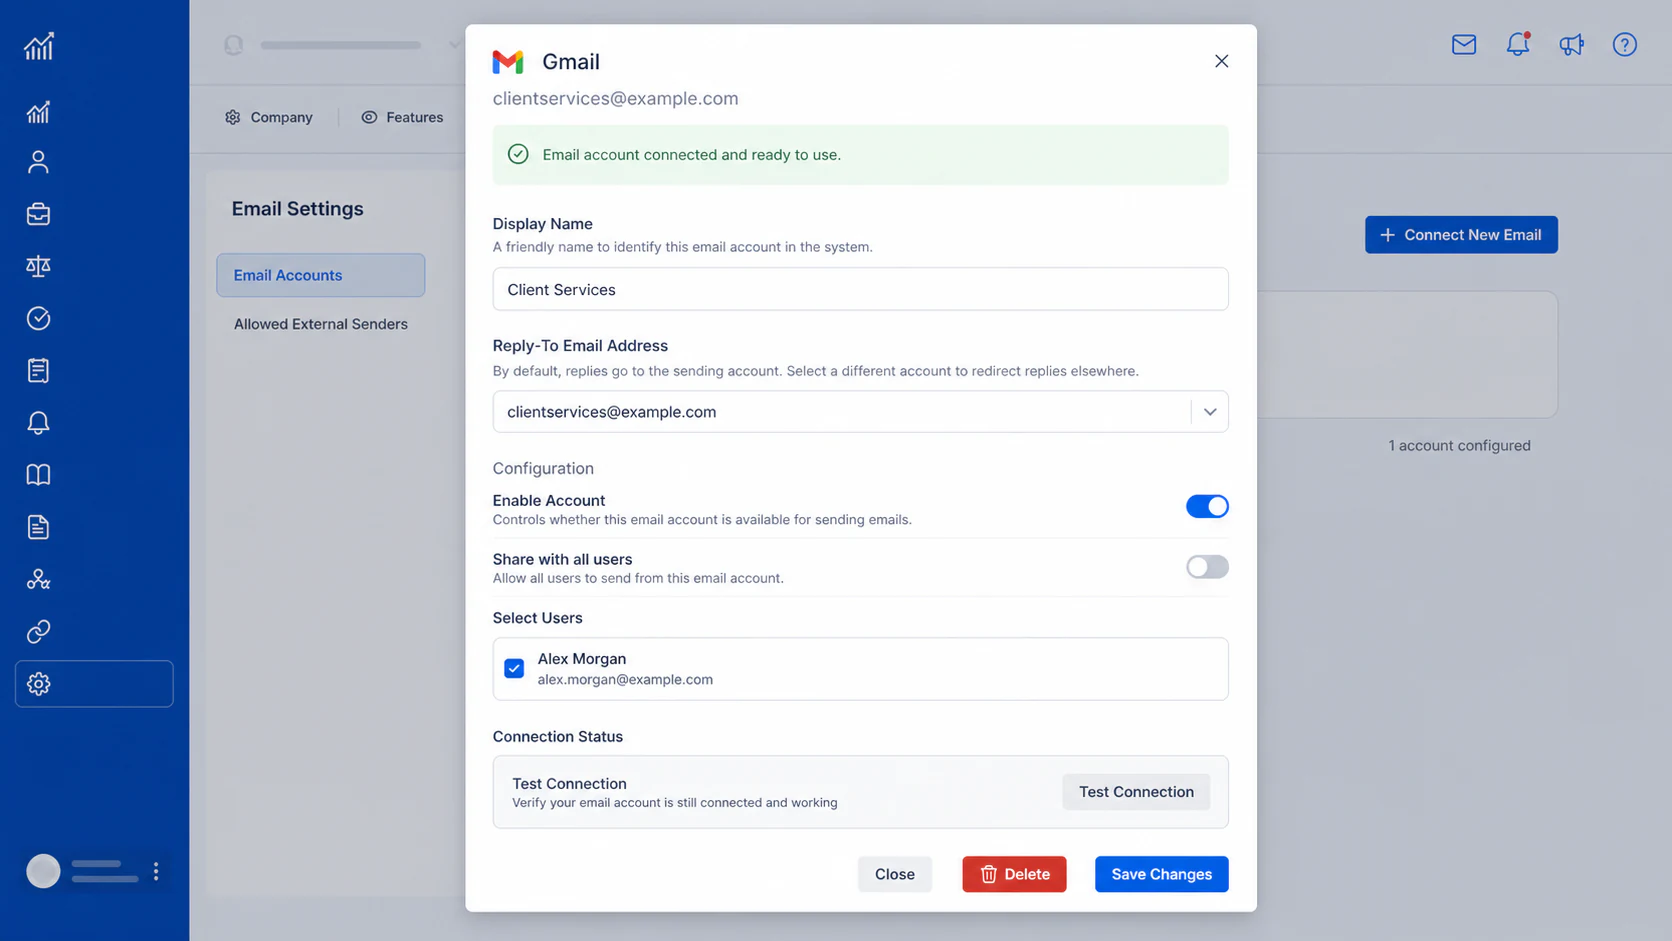
Check the account details, then select Save Changes.
Review a connected email account and choose who can use it
The account settings include:
Display Name - The friendly account name shown in AdviserAide.
Reply-To Email Address - Leave this as the connected account for most setups. Choose another connected account only when replies should arrive in a different inbox.
Enable Account - Controls whether the account is available when users send email.
Share with all users - Allows everyone in your organisation to send from the account.
Select Users - Turn off sharing with all users to give access only to selected users.
Test Connection - Checks whether AdviserAide can still connect to the account.
Connected an Outlook account? If recipients tell you your emails arrive without images or attachments, or with an attachment called winmail.dat, double-check your Microsoft 365 settings - see Recipients receive a winmail.dat attachment.
AdviserAide monitors connected accounts for relevant sent and received emails and tries to keep them with the correct case.
Emails do not appear in AdviserAide immediately. After you send an email, or after a received email reaches your inbox, allow 5-10 minutes for it to appear against the relevant case or under Unmatched Emails.
Replies to an email already linked to a case remain with that case.
When one client or employer matches the email address and has one open case, the email is linked automatically.
When the match is unclear, the email appears under Unmatched Emails for manual allocation.
Any attachments remain with the email when it is linked to the case.
The client’s or employer’s email address must already be recorded in AdviserAide for automatic matching. Keep their email address up to date on their AdviserAide record. To import email from a trusted address that is not saved against a client or employer, see Allowed External Senders.