

The new contract editor is available to all new AdviserAide customers. If your organisation currently uses the existing contract editor and would like access to the new editor, contact our support team.
{{ClientFirstName}}, {{ClientAddress}}, or {{CaseCategory}}, and you’re done. When you assign the contract to a case, AdviserAide automatically checks which placeholders you’ve used, pulls all the relevant information from the client and case profiles, and injects it into your template-no manual editing required.
Once the contract is populated, you can generate a secure link and send it to your client for electronic signature. The signed agreement is automatically saved as a PDF in the case documents.
In this guide, we’ll walk through creating a contract template and then assigning it to a case to generate a shareable signing link. Your account comes with a sample contract template called Client Agreement that you can use as a reference or starting point.
Preparing a Contract Template
1
Open Contract Templates
From the main navigation, click Contract Templates. The Contract Templates list shows all existing templates and the Create Contract Template button.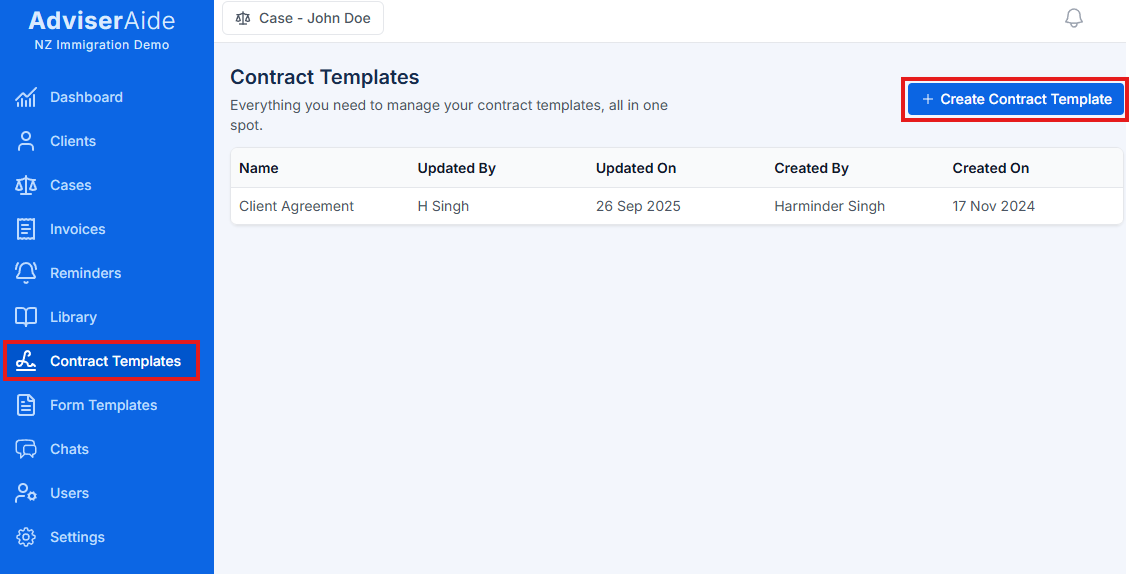
2
Create a new template
Click Create Contract Template. A document editor opens where you can build your template.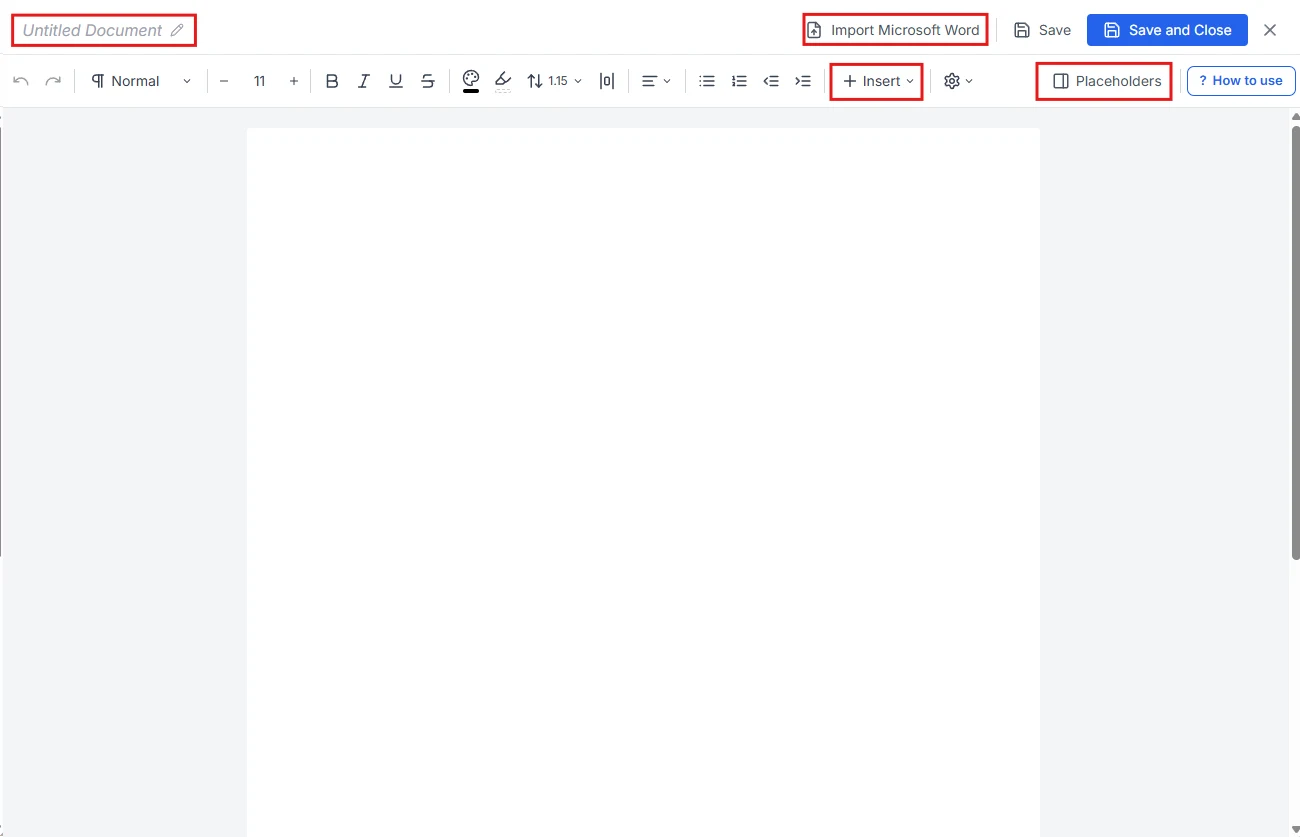 In the editor screenshot above you see the following items highlighted:Untitled DocumentThis is where you set the template name. Click it to turn it into a text box, then enter the name you want.Import Microsoft WordThis allows you to import a Microsoft Word document directly into the editor. This is useful if you already have an agreement in Word format and do not want to rebuild it.Add imagesSelect Insert, then Image to add an image to the agreement.
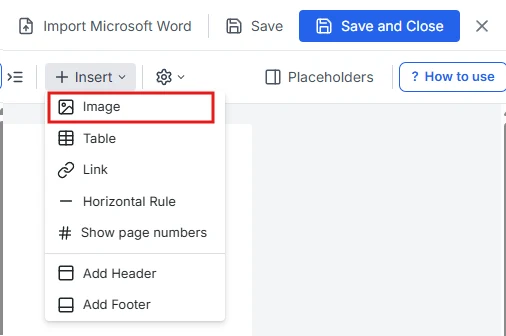 You can use this to add an adviser’s signature image or a screenshot of the Professional Standards PDF to the last page of your agreement.Insert placeholders
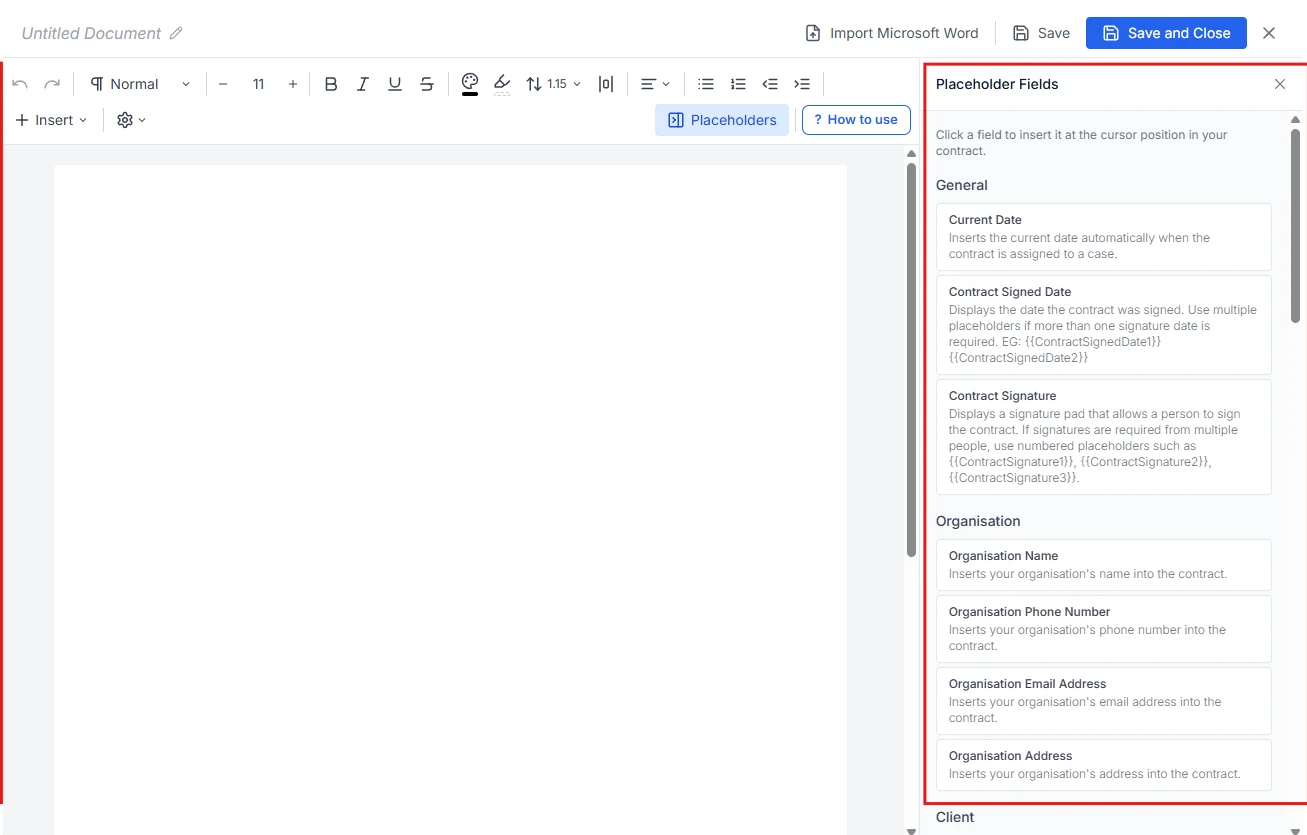 Placeholders make your templates reusable. They will automatically fill in with client or case information when the contract is assigned. Examples include:When the contract is assigned to a case, placeholders are automatically replaced with the relevant data. If any data is missing, Adviseraide will prompt you to fill it in.
{{ClientFirstName}}{{ClientLastName}}{{ClientEmailAddress}}{{CaseCategory}}
{{CurrentDate}}– inserts the date the contract is created{{ContractSignedDate1}}, {{ContractSignedDate2}}– inserts signer completion dates (use numbered versions for multiple signers){{ContractSignature1}}, {{ContractSignature2}}– creates signature fields (numbered for multiple clients)
- Click inside the document where you want the information to appear.
- Select Placeholders. A panel opens with categories such as General, Organisation, Client and Case.
- Select the placeholder you want. AdviserAide inserts it automatically at the position you selected in the document.
Multiple signaturesWhen more than one person needs to sign, use numbered signature and signed-date placeholders. Keep the numbers matched for each signer:
- First signer:
{{ContractSignature1}}and{{ContractSignedDate1}} - Second signer:
{{ContractSignature2}}and{{ContractSignedDate2}}
3
Save the template
Once you are happy with the contract, select Save and Close. Your reusable template is now ready.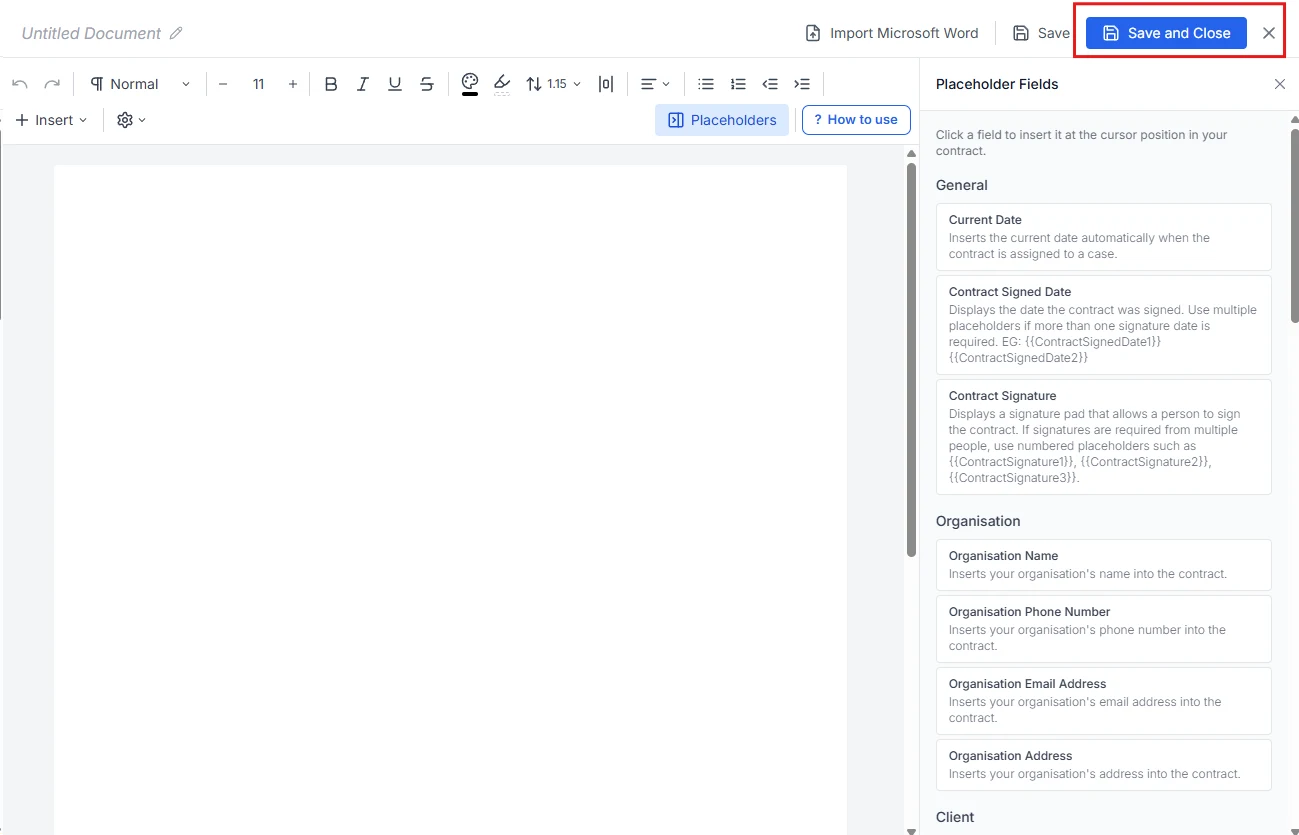
Assigning a contract to a case
1
Open the Contracts tab
Open the relevant case and navigate to the Contracts tab. This tab lists existing contracts and includes Assign Contract buttons.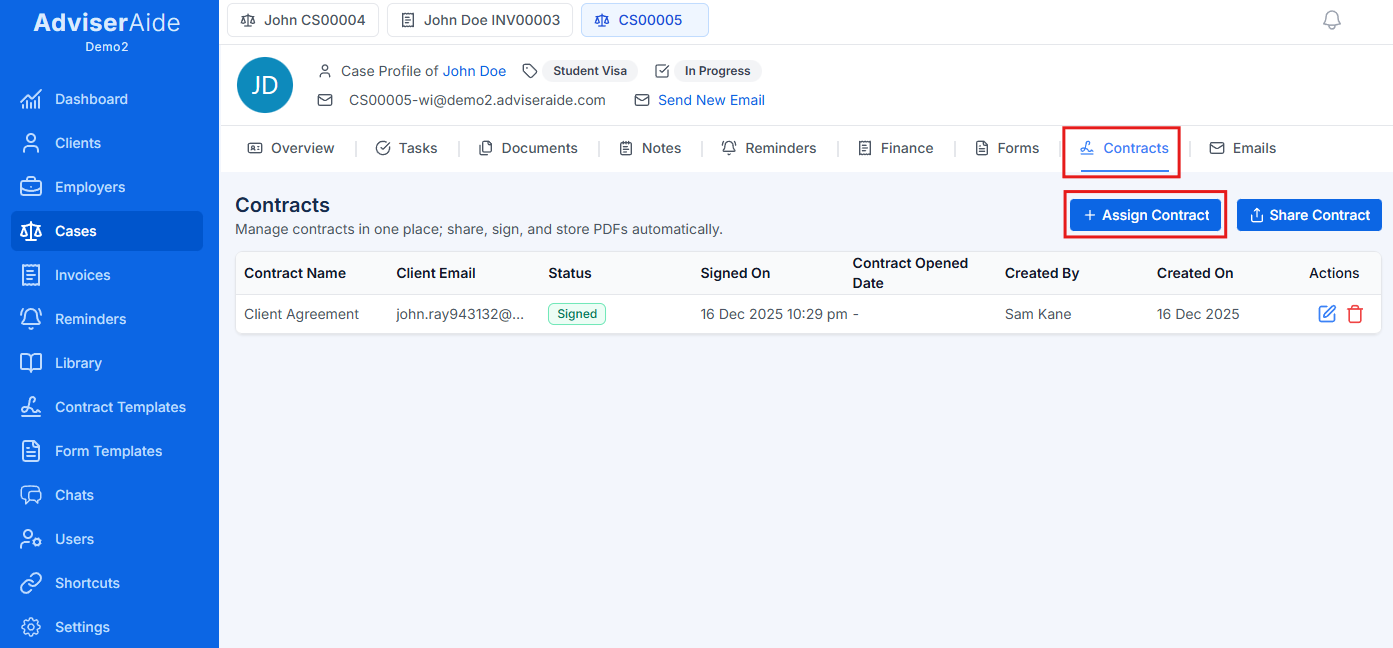
2
Choose a template
Click the Assign Contract button. The Choose Contract Template dialog displays all available templates. Click the template you want to use.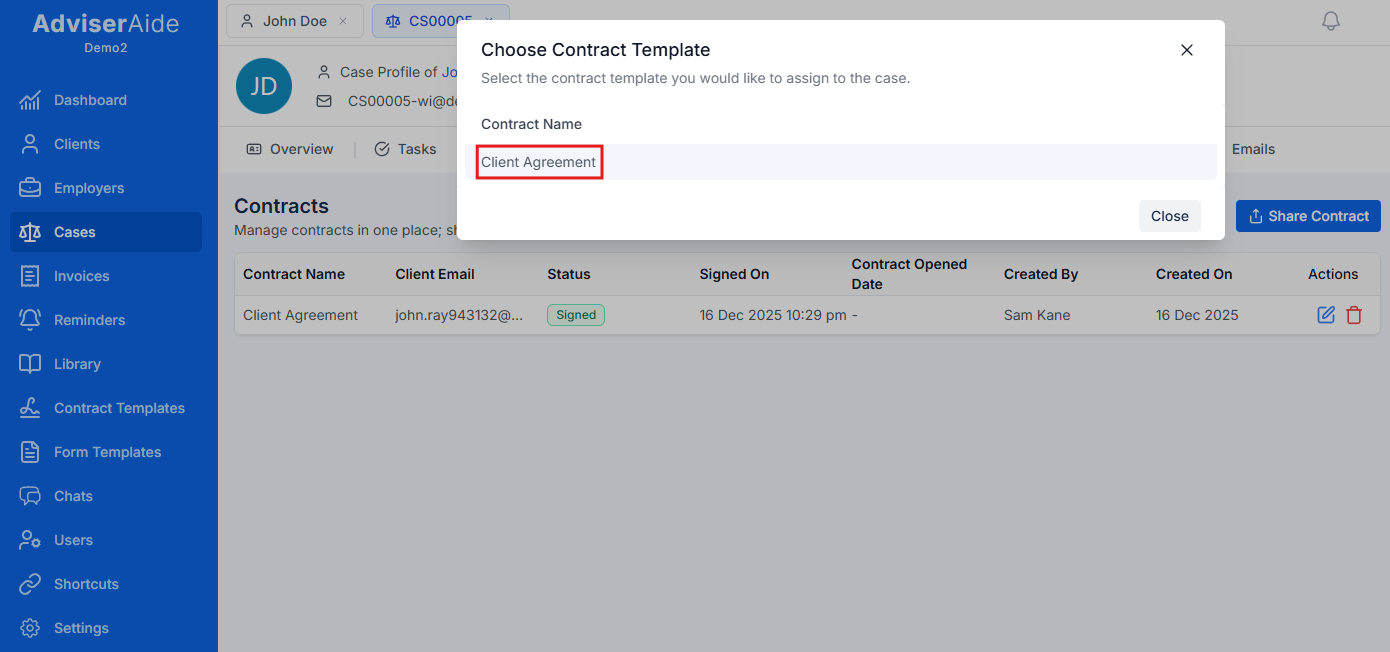
3
Review and edit the contract
Adviseraide opens the contract in the Create Contract editor with all placeholders replaced by case-specific data.Review the contract and make any additional edits. If you see placeholders in curly braces 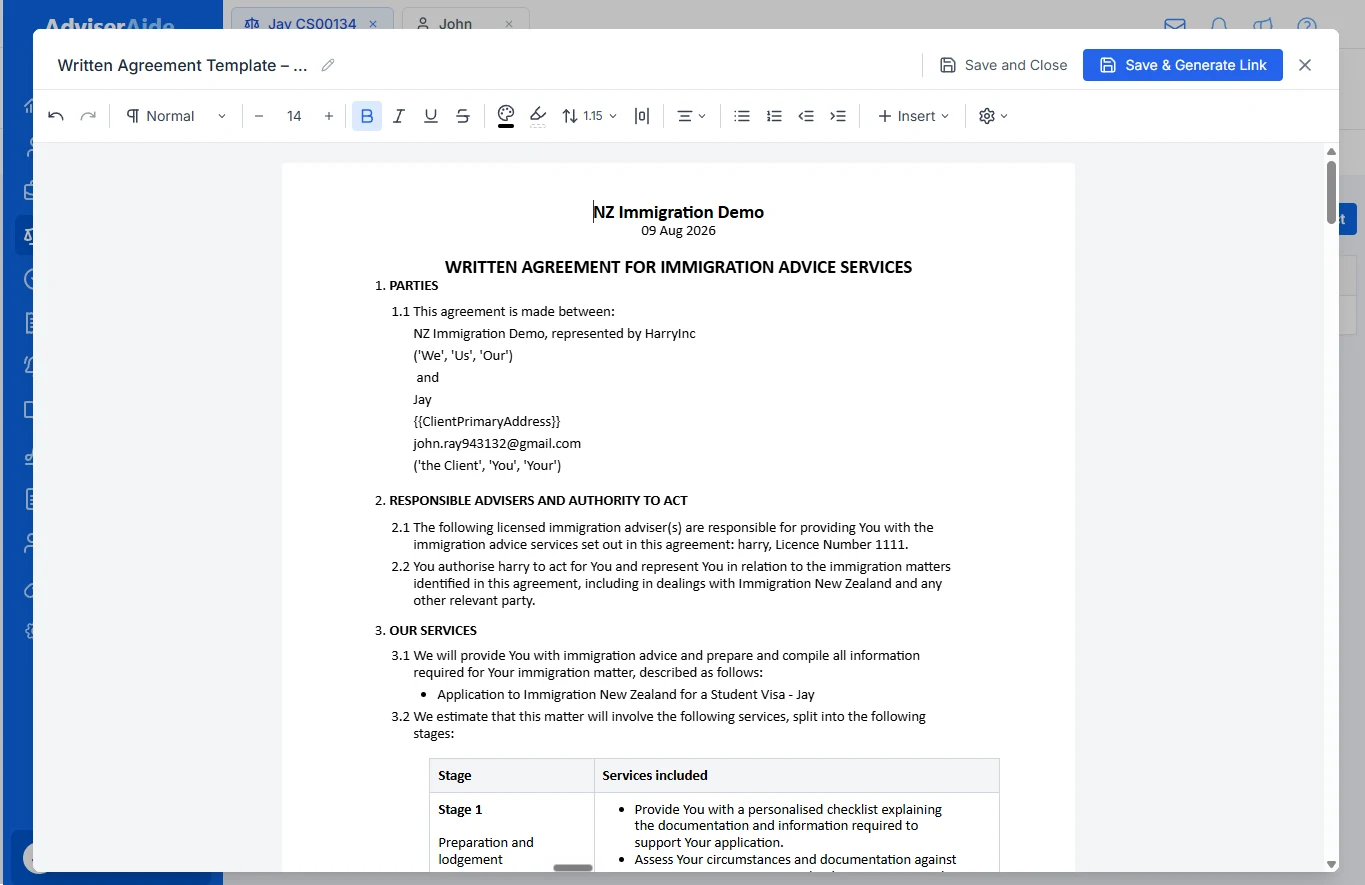
{{ }} that are not replaced, fill them in manually - they were likely left blank because the client profile does not contain that information. Do not modify signature or signed-date placeholders, including numbered versions such as {{ContractSignature1}} and {{ContractSignedDate1}}, because the client completes them when signing.4
Generate a shareable link
When the contract is ready to send, click Save & Generate Link. Adviseraide saves the contract to the case and provides a secure link that you can copy.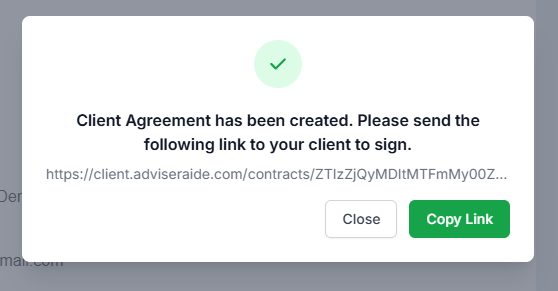
5
Send to client
Send this link to the client via email or any other communication channel. Alternatively, Save and Close will save the contract without generating a link if you need to finish later.
Client Signing and What Happens Next
1
Client signs the contract
The client opens the contract link on their computer or mobile device. Placeholders like
{{ContractSignature}} appear as a signature pad that the client can sign with a mouse or finger. Once the signature is applied, {{ContractSignedDate}} automatically captures the date.2
Contract is saved as PDF
After the client clicks the final submit button, Adviseraide converts the contract into a PDF and stores it in the case’s Documents tab. The contract record in the Contracts tab updates its status to Signed.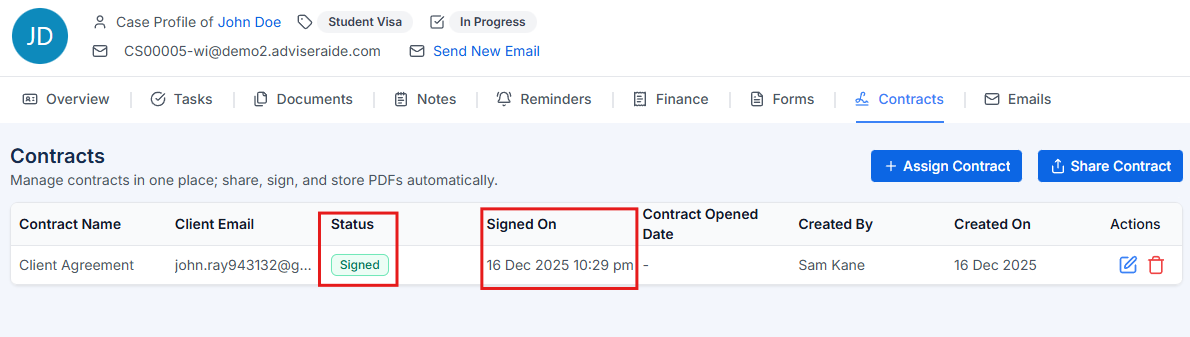
3
Email notifications
You will receive an email notification confirming that the client has signed the contract. The client will also receive an email with a link to download the contract.